Blend Modes in Photoshop Explained
By Karen Schulz
Learn the Basics for the What, Where, How, and Why of Blend Modes in Photoshop
Whether you’re new to digital scrapbooking or a seasoned scrapper, understanding how Blend Modes work will give you more options to enhance your page. Let’s learn the basics, and then take a look at some practical examples. (Be sure to download the gift at the bottom of this tutorial so you can experiment with Blend Modes yourself.)
What are Blend Modes?
Blend Modes change the way that one layer in Photoshop interacts with the one beneath it. The default Blend Mode is normal, so – no worries – nothing strange will happen to your layers unless you make the change yourself.
Where are Blend Modes Located?
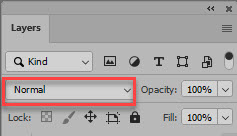
Blend Modes are located at the top of the Layers Panel, both in Photoshop and Photoshop Elements.
How Do You Change Blend Modes?
To change Blend Modes, click on the down-pointing arrow in the Blend Modes Box to access the Dropdown Menu. Click on the Mode that you would like to use.
And the Biggest Question is Why? Why use Blend Modes?
Blend Modes are like magic! Just by changing the Blend Mode, you can create a variety of entirely different looks, even though you are working with the same 2 layers. And with all of the Blend Modes available, well, it’s a Creative’s dream to have so much versatility at their fingertips.
Don’t be intimidated by the sheer number of Blend Modes available to you. Notice that they are grouped into sections by a dividing line. The Blend Mode options within each section technically work in different ways but are grouped together based on their general use.
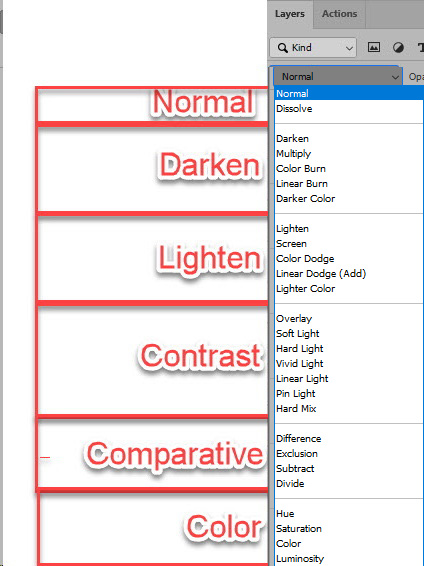
Although in digital scrapbooking, there can be times when we could want to use any of these modes the ones that are most commonly used are Multiply, Screen, Overlay, Soft Light, Hard Light, and Color. But don’t limit yourself, experimentation can often give the most surprising and satisfying results!
TIP: To quickly scroll through Blend Modes, left-click inside the Blend Mode Box, then tap on the down-pointing arrow on your keyboard. Each tap will advance you to the next Mode. Real-time changes will occur on your document allowing you to see and determine which Blend Mode works best for the images with which you are working.
3 Practical Examples of How Using Blend Modes Can Enhance Your Scrapbook Pages:
I. Add Texture to a Background Paper:
- Open an overlay or texture.
- In the Layers Panel, click on the Create New Fill or Adjustment Layer icon and choose Solid Color.
- In the Color Picker select the color you would like to use. Click OK.
- Experiment with Blend Modes of the Solid Color layer to get the result you like.
TIP: Experiment with lowering the Opacity of the Color Fill layer to give you even more options.
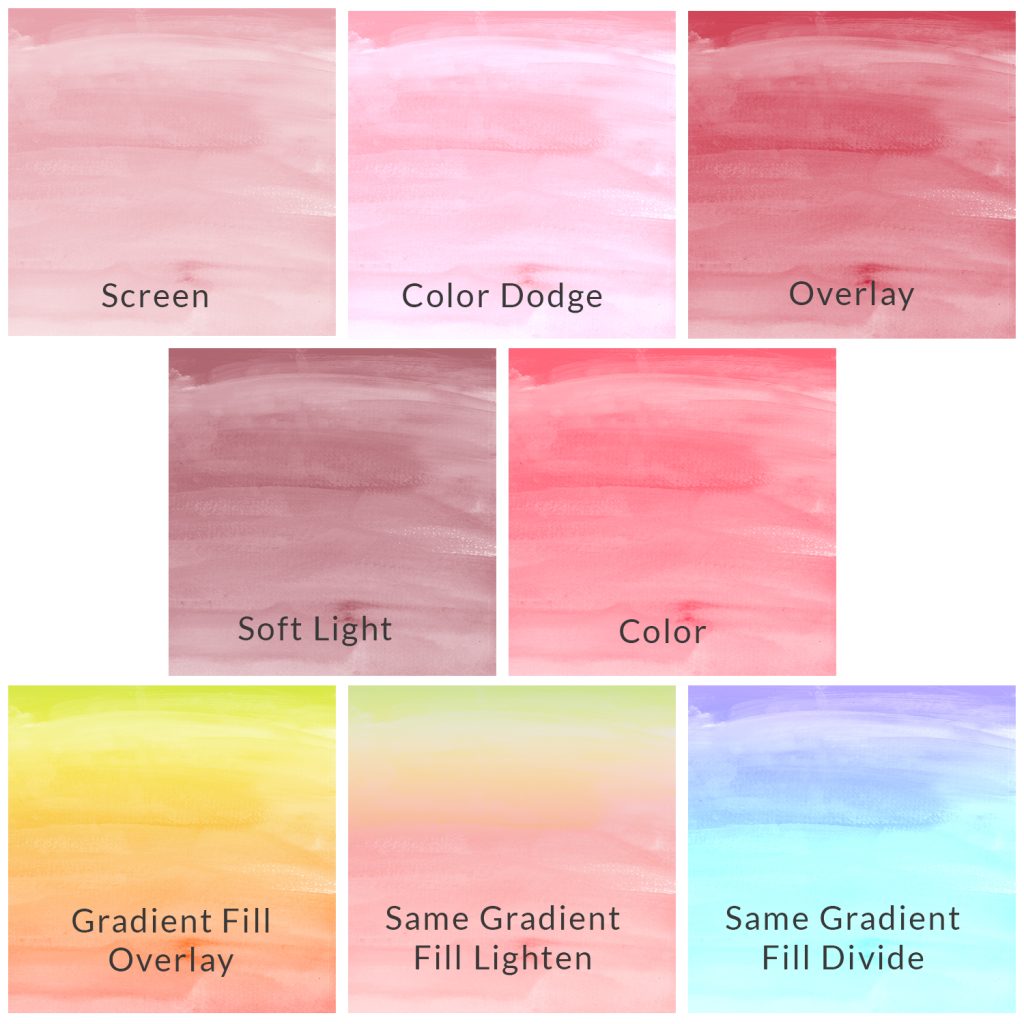
The Blend Mode you use and the results you get will depend upon the characteristics of the 2 images you are using. Below is an example of 5 different results using a watercolor overlay (ks-watercolor-texture-06-01) and Color Fill c51f35. Any of these images would be acceptable and would depend upon your preference and need.
Tip: Using a Gradient Fill with different Blend Modes gives you even more options.
II. Use Blend Modes when you work with Blendables, Stamps, Paint, Scribbles, Borders, and Edges
Experiment with Blend modes on any of these products, and I think you’ll be pleasantly surprised at all of the variations you can come up with. Let’s look at just 2 examples.
Some of these products can be simply placed on your background and they will look great, but that’s not always the case. For example, below is a Blendable (ks-bucket-list-stamps-03) placed on a background paper (ks-bucket-list-paper 13). In the first image, the Blendable is just placed on a paper. It looks … not so good. In the 2nd image, the Blend Mode of the Blendable has been changed to Overlay. Much better! And this would make a pretty background.

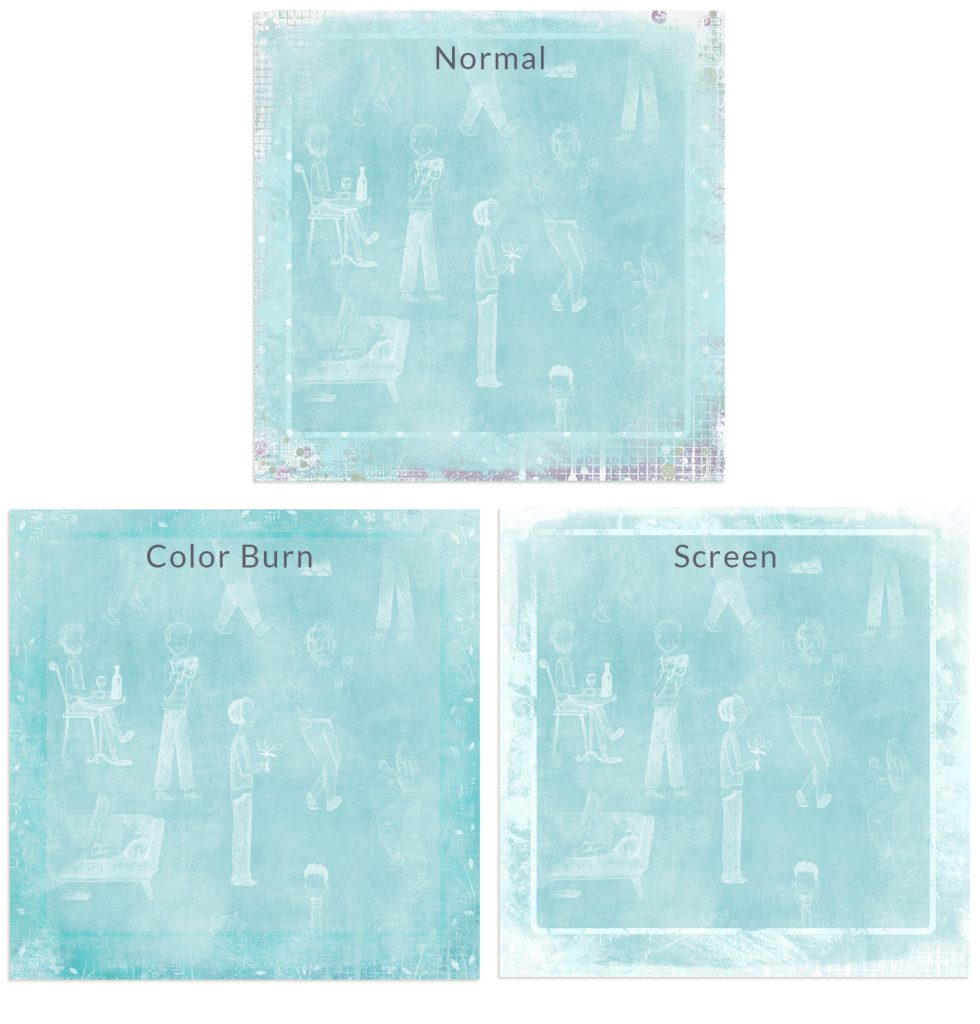
For the next example, I’ve placed a Life After 50 Edge on a Life after 50 Paper. Several Blend Modes worked really well for these 2 images. My favorites were Color Burn and Screen.
III. Use Blend Modes to Create Realistic Text on Crumped or Creased Papers:
When adding Type to a crumpled or creased paper, it can be a challenge to make the Type adopt the texture of the background. Blend Modes can help with that.
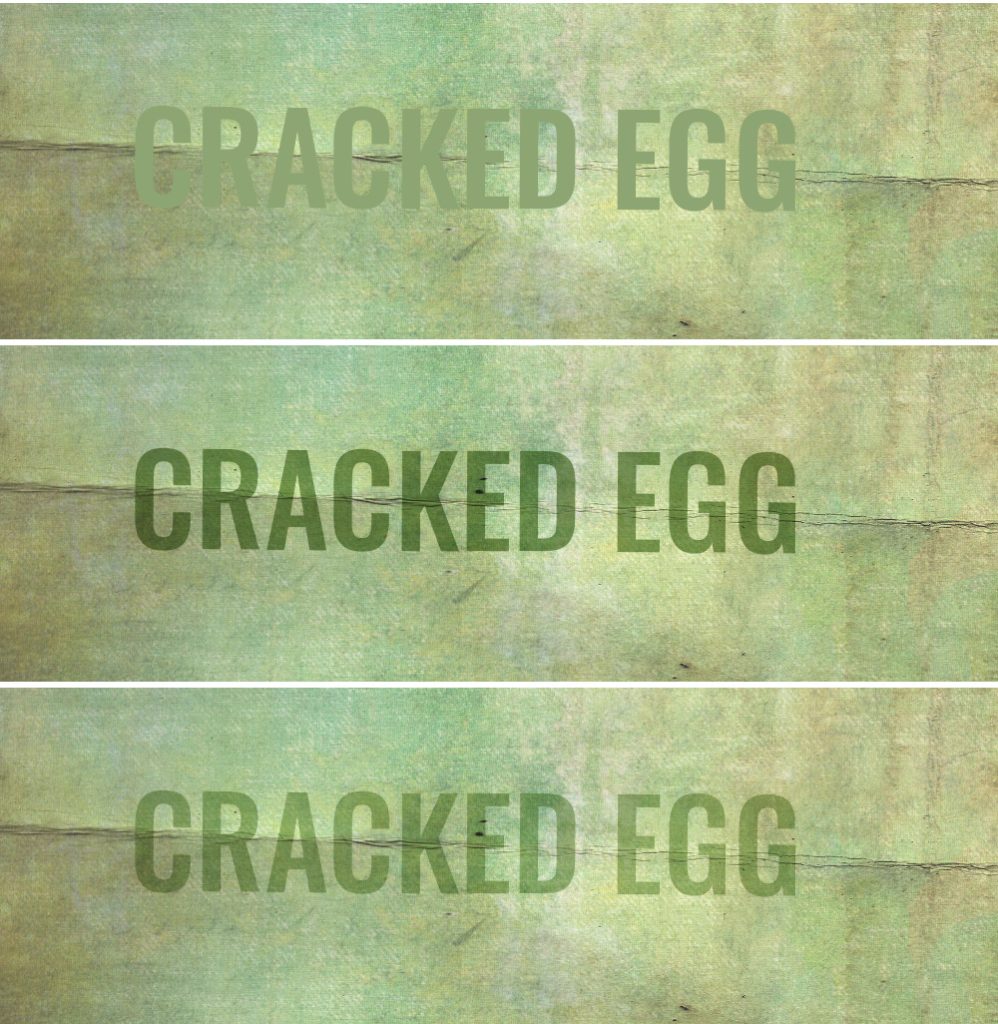
In the first image below, I have added Type on top of a crease. It looks like it’s been pasted there and doesn’t appear to be an integral part of the paper design.
In the 2nd image, I cycled through the Blend Modes to see which Mode would make the Text take on the paper texture. Multiply made the text look the best on the crease, although it did darken the text. If that’s okay with your paper design, you’ll be all set.
If you want your Text to be lighter, a quick Levels Adjustment can do the trick. (Image > Adjustment > Levels. Drag the Middle Slider to the right to darken and to the left to lighten. Be sure to clip the Levels Adjustment to the Text to keep the Adjustment from affecting all your Layers.)
Final Tips:
- Remember that there is not a magic formula that will work every time you work with Blend Modes. Your results will depend upon the products and colors you are working with.
- If you are an advanced Photoshop user, you can also incorporate Levels and Curves Adjustments to tweak your images.
Example for Your Experimentation
Visit my shop to download a Watercolor Overlay Gift. Experiment on your own and let me know what you think. Comment here, in the Tips & Tricks Challenge, send a Private Message or contact me by email.
Join Me…
… in the February Tips & Tricks Challenge and show off your new Blending Skills.
Download…
…a PDF of Blend Modes Explained.
Connect with Me…
- My Shop at Oscraps
- Tutorials and more on my website
- Inspiration using my products here in the Oscraps Gallery
- Follow me on Social Media: Facebook | Facebook Group | YouTube
[…] you would like to learn more about Blend Modes, my tutorials What are Blend Modes in Photoshop and Blend Modes in Photoshop Explained should […]
[…] through the Blend Modes until you find one that works for your project. (Need more instruction? My Blend Modes Explained tutorial on the Oscraps Blog should […]