Vicki Robinson has created a fabulous video to cover this topic if you would prefer to watch that HERE.
This a written version for those that would prefer to print out and refer back to it when needed.")
Adding a Layout to the Oscraps Gallery:
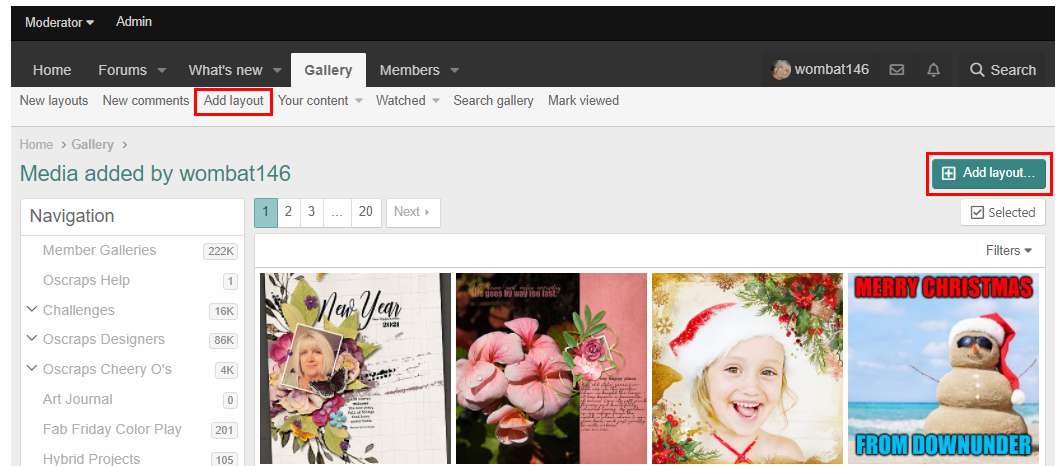
1. On the Gallery screen click the Add Layout button (top right corner) or the link on the Navigation toolbar.
OR
Go ahead and select the gallery you want to use first and then click the Add Layout button.
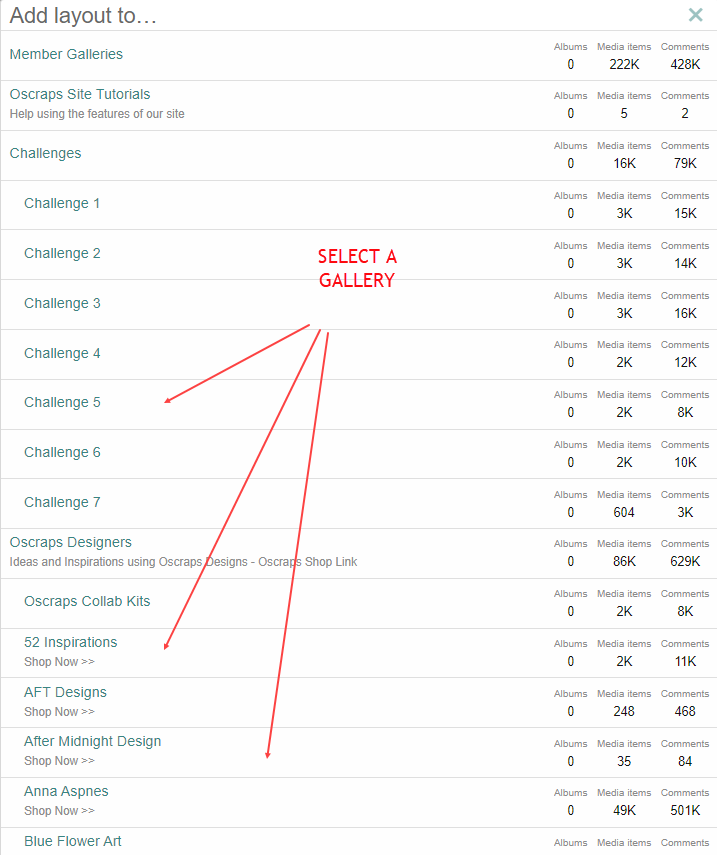
2. Select the first gallery you want to upload to (if you haven’t done this already), adding it to other galleries is done at Step 5b below.
If your layout is for a monthly challenge, then select the relevant challenge # gallery ie. Challenge 1, 2 or 3 etc. Or if it is for a Designer’s challenge then select the relevant Designer’s gallery. *No matter what gallery you choose to upload your layout to, always add your layout to the Members Gallery - this used to be done by default in the old forum but now you need to do this yourself.
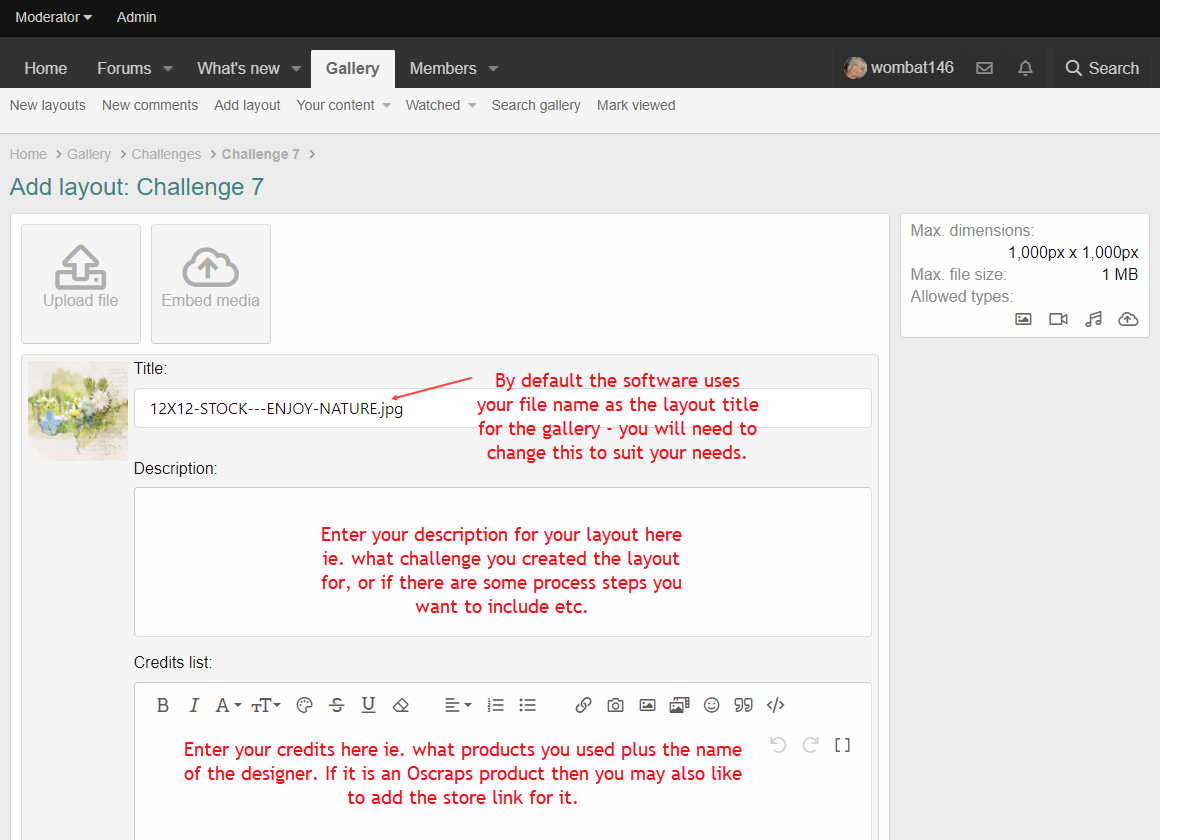
3. Click the Upload File button on the next screen. Find your layout on your computer and select it. *Max size for a layout to upload to the gallery is: 250Kb (whether it is a square or rectangular format) - your layout needs to be resized in your software before uploading to the gallery.
Disregard the the information appearing on the right hand side, referring to 1000x1000 with IMb.

4. Then click the Save button.
5. On the next screen you need to enter:
a. - The Title field (required); is automatically filled out using the layout name, but you can change it here by highlighting and then typing in your layout name (see below).
b. - Description field (required); this area can be used to comment about why you created the layout or if it was made for a challenge, or even to share a summary of the steps you took to create it (see below).
c. - Credits list (required); your credits can go in this area, please always credit the products you have used along with the designer’s name, including non Oscraps products and designers (see below).
**If you copy and paste the Oscraps product link from the store into this area, the program will automatically insert the name of the product and designer, however, the linking is entirely optional for our members.**
When filled out it will look similar to this:

5b. Between the Description and Credit List sections there is an Additional Categories/galleries section where you can select what additional galleries you want your layout to appear in.

Click the Show link to access the list of available galleries, use the scroll button on the right to move up and down the list. Click each gallery that is required.

6. Click the Save button to complete your upload.
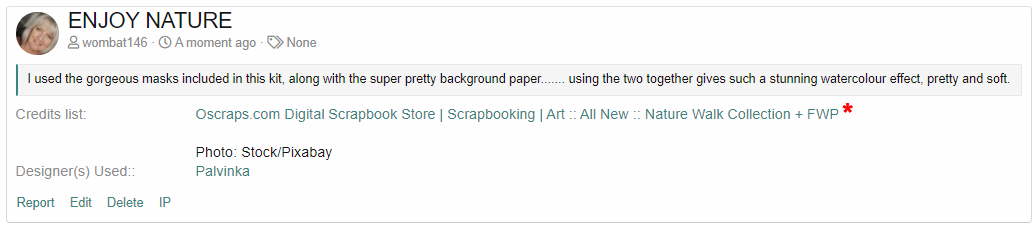
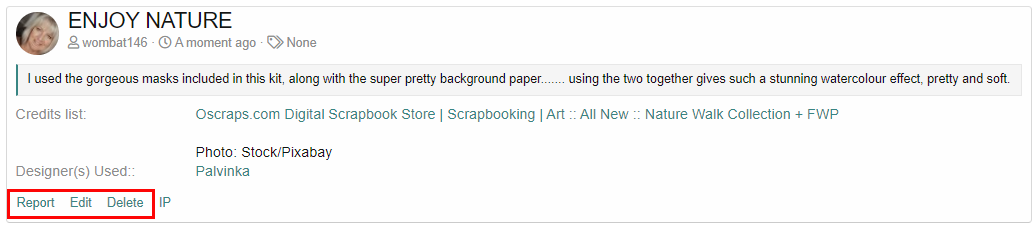
Example of uploaded layout in the gallery:
In the gallery your layout will now look similar to this example with all the information you entered shown below your layout image:
*Note: Our designers are gradually switching out coded page titles to be more SEO friendly - meaning they are more likely to come up when people search in Google or Bing. So, for now you will see a mixture of Product Name links and Product Name links that also display the shop category, the product name and the designer name.
Editing your Layout:
Click on your layout to open, then use the Edit link below your layout (see below). You will return to the original upload screen where you can edit your text, add store links or add your layout to additional galleries.
Use the Delete link to delete your layout if you need to.
PLEASE NOTE: Entering a product store link is entirely optional, but it does help our fellow scrappy friends to find products more easily and quickly.
If adding a store link - Getting a Store Link first:
1. Open the store in another tab and open the product/s you used for your layout.
2. For each product, click on the URL link at the top of your browser and copy.
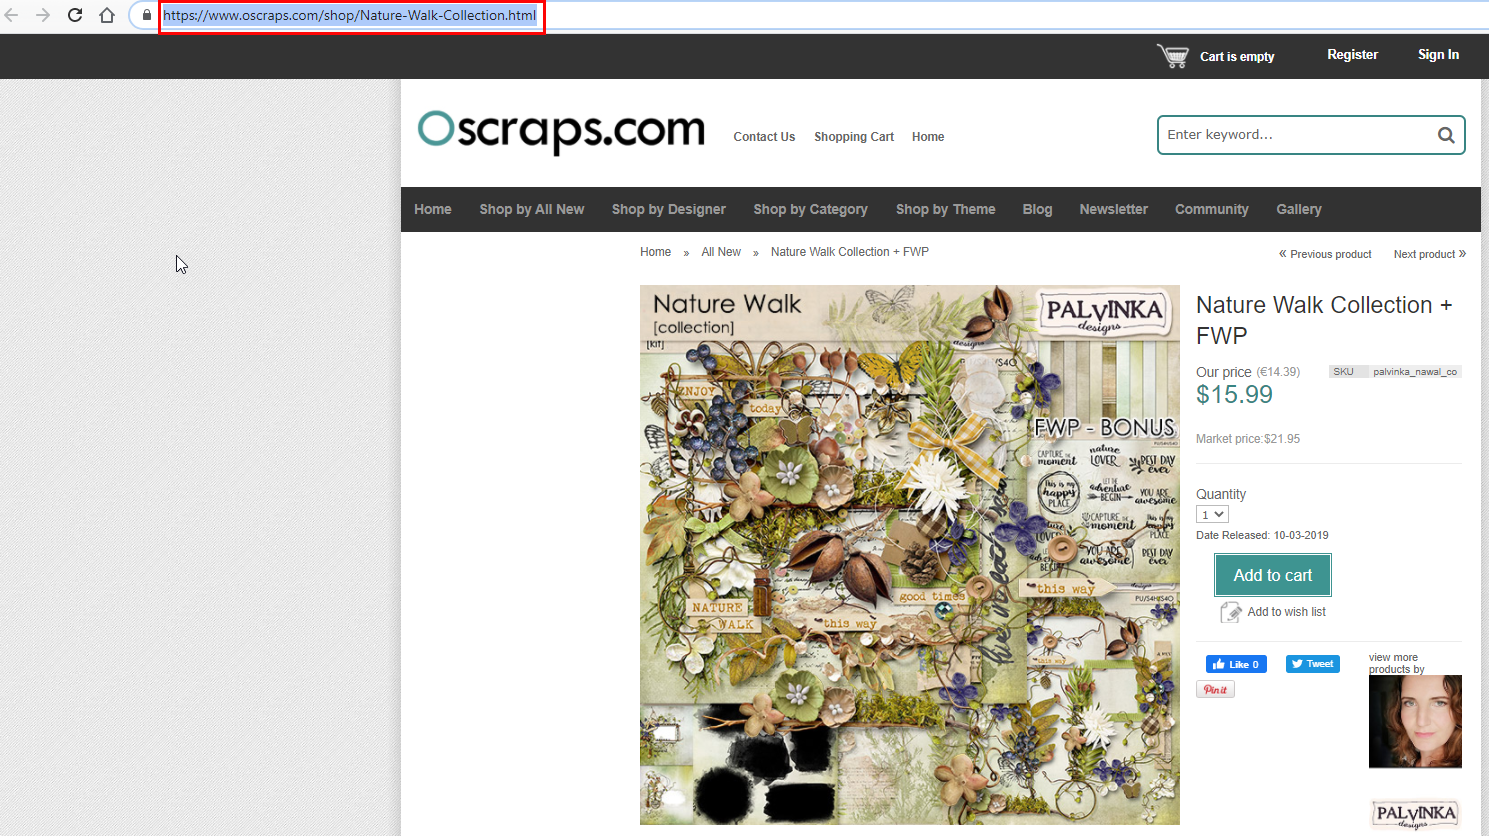
3. Go back to your Credits list for your layout and paste the link.
If Adding your Layout to Additional Galleries:
After clicking the Edit link you will see the Show Additional Categories link at the bottom of the screen. When you click on it you will be presented with the same list as in Step 5b above, use the scroll button to move up and down the list and just click the galleries that are required.

Click the Save button at the bottom of the screen to save your editing and quit the Edit box after you have finished.
The Delete link can be used to delete your layout entirely if you need to.
As always, if you have any questions about this guide, then please feel free to ask here in this thread.
This a written version for those that would prefer to print out and refer back to it when needed.
Adding a Layout to the Oscraps Gallery:
1. On the Gallery screen click the Add Layout button (top right corner) or the link on the Navigation toolbar.
OR
Go ahead and select the gallery you want to use first and then click the Add Layout button.
2. Select the first gallery you want to upload to (if you haven’t done this already), adding it to other galleries is done at Step 5b below.
If your layout is for a monthly challenge, then select the relevant challenge # gallery ie. Challenge 1, 2 or 3 etc. Or if it is for a Designer’s challenge then select the relevant Designer’s gallery. *No matter what gallery you choose to upload your layout to, always add your layout to the Members Gallery - this used to be done by default in the old forum but now you need to do this yourself.
3. Click the Upload File button on the next screen. Find your layout on your computer and select it. *Max size for a layout to upload to the gallery is: 250Kb (whether it is a square or rectangular format) - your layout needs to be resized in your software before uploading to the gallery.
Disregard the the information appearing on the right hand side, referring to 1000x1000 with IMb.
4. Then click the Save button.
5. On the next screen you need to enter:
a. - The Title field (required); is automatically filled out using the layout name, but you can change it here by highlighting and then typing in your layout name (see below).
b. - Description field (required); this area can be used to comment about why you created the layout or if it was made for a challenge, or even to share a summary of the steps you took to create it (see below).
c. - Credits list (required); your credits can go in this area, please always credit the products you have used along with the designer’s name, including non Oscraps products and designers (see below).
**If you copy and paste the Oscraps product link from the store into this area, the program will automatically insert the name of the product and designer, however, the linking is entirely optional for our members.**
When filled out it will look similar to this:
5b. Between the Description and Credit List sections there is an Additional Categories/galleries section where you can select what additional galleries you want your layout to appear in.
Click the Show link to access the list of available galleries, use the scroll button on the right to move up and down the list. Click each gallery that is required.
6. Click the Save button to complete your upload.
Example of uploaded layout in the gallery:
In the gallery your layout will now look similar to this example with all the information you entered shown below your layout image:
*Note: Our designers are gradually switching out coded page titles to be more SEO friendly - meaning they are more likely to come up when people search in Google or Bing. So, for now you will see a mixture of Product Name links and Product Name links that also display the shop category, the product name and the designer name.
Editing your Layout:
Click on your layout to open, then use the Edit link below your layout (see below). You will return to the original upload screen where you can edit your text, add store links or add your layout to additional galleries.
Use the Delete link to delete your layout if you need to.
PLEASE NOTE: Entering a product store link is entirely optional, but it does help our fellow scrappy friends to find products more easily and quickly.
If adding a store link - Getting a Store Link first:
1. Open the store in another tab and open the product/s you used for your layout.
2. For each product, click on the URL link at the top of your browser and copy.
3. Go back to your Credits list for your layout and paste the link.
If Adding your Layout to Additional Galleries:
After clicking the Edit link you will see the Show Additional Categories link at the bottom of the screen. When you click on it you will be presented with the same list as in Step 5b above, use the scroll button to move up and down the list and just click the galleries that are required.
Click the Save button at the bottom of the screen to save your editing and quit the Edit box after you have finished.
The Delete link can be used to delete your layout entirely if you need to.
As always, if you have any questions about this guide, then please feel free to ask here in this thread.
Attachments

Last edited: