Oscraps

March Challenge #1 - Creative Techniques

wombat146

ONA - Administrator
CHEERY O
1709269670882.png
All members that participate, can everyone PLEASE ensure that you read all the rules for this challenge
so that you can claim your challenge points. Thank you! :)


Hi everyone, and welcome to this month's Creative Technique. At the moment I am into creating grungy type layouts and so I thought I would share a tutorial I found a little while back on how to create a Photocopied Grungy effect on a photo quickly using a couple of Photoshop filters.

Please note that this tutorial is written for Photoshop CC and may not be suitable for PSE or any other program you use. If this is case, please read through the process steps and look at the final result and see if your program has any filter that resembles it and go ahead and use it on your photo, but please let me know in this thread what program you used and how you achieved a similiar look.

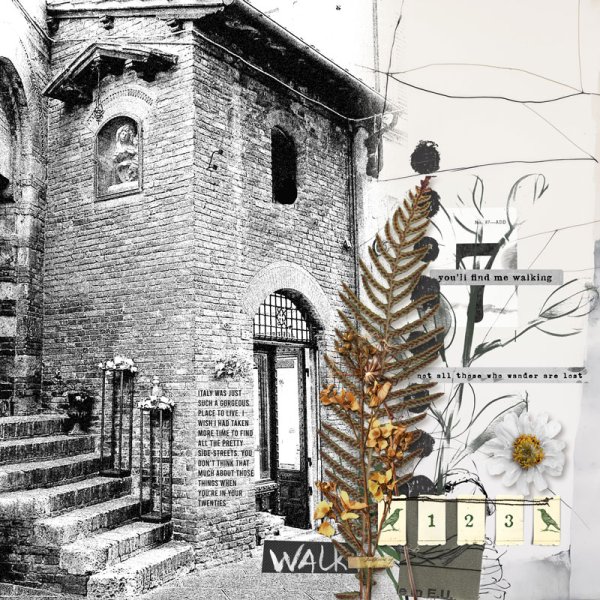
Important: Before we start, this type of effect works a lot better on portrait type photos, and the photo needs to be at 300dpi resolution. This effect could also be used on structural type photos (buildings, bridges etc), but forget landscape type or anything that has a lot of detail in it.

This is the photo I will be using, it is from Upsplash by Jez Timms and as you can see is a close up photo of a woman. I liked that the photo set up with her placed on the right hand side. It originally was at 72 dpi and so I needed to change it as per the info below.
Resizing-photo-WEB.jpg


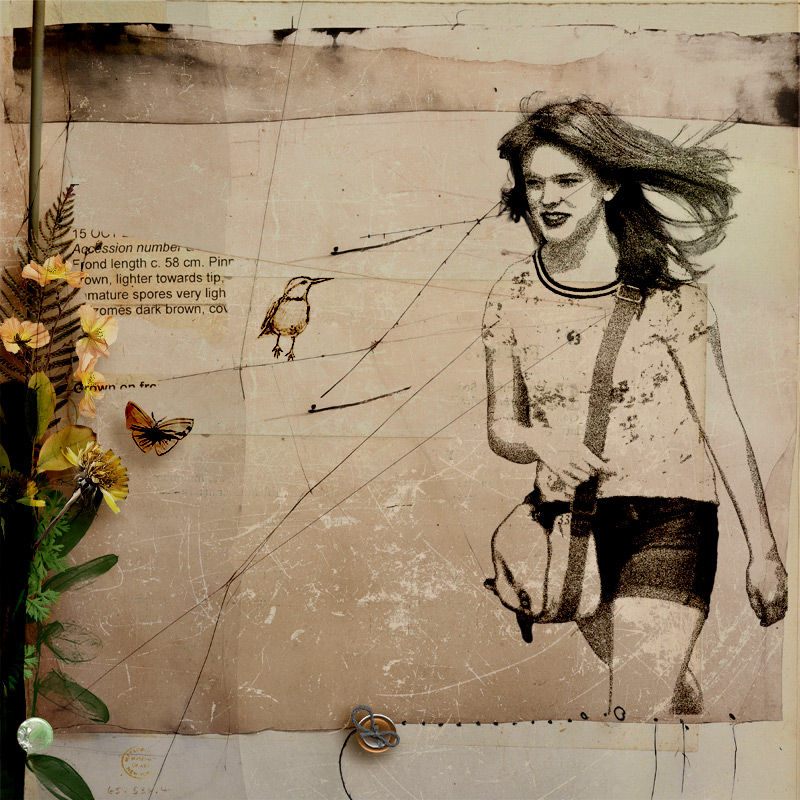
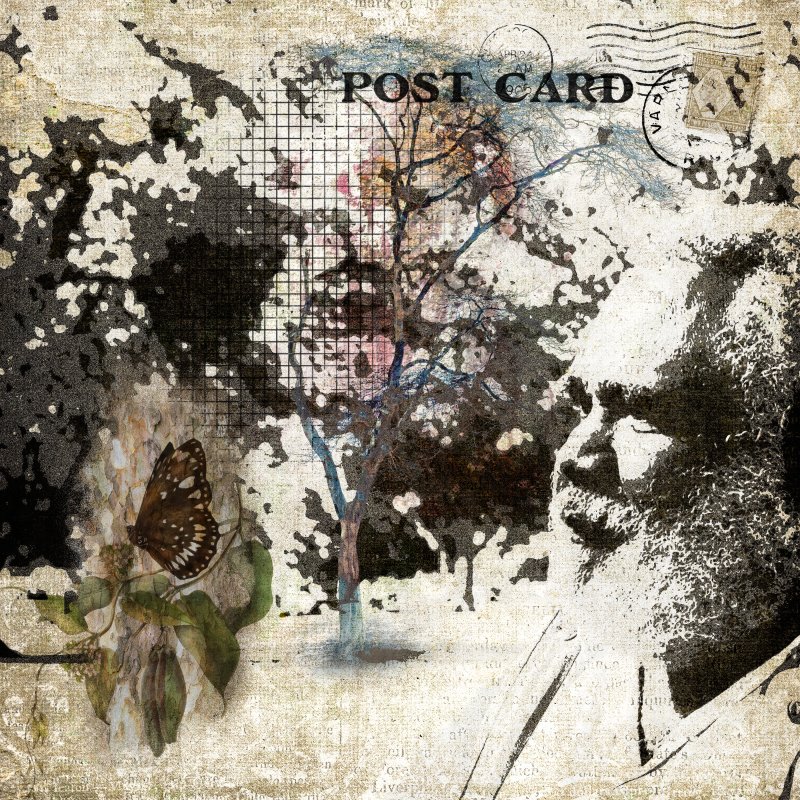
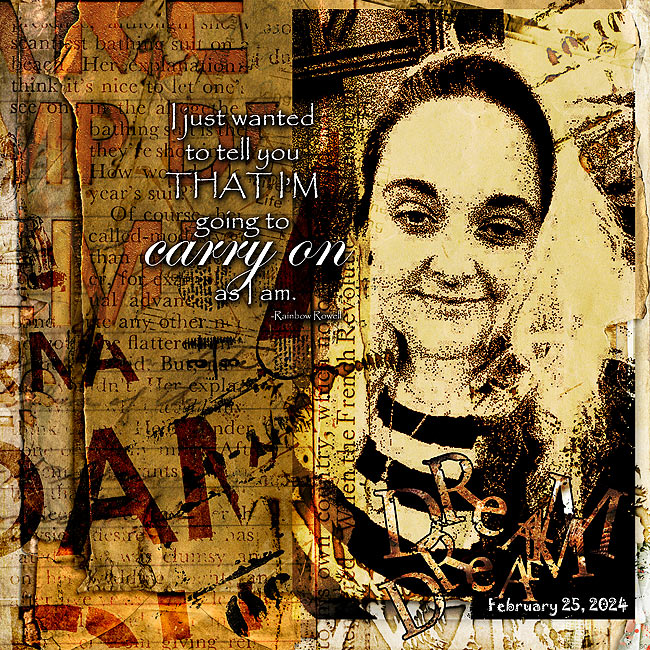
This is final result of the photo after applying the grungy photocopy type filter effects to it.

Resulting-photo-after-effects.jpg
Let's get started:

1.
Open your photo and resize if needed. Make sure the photo has some definite contrasting tones in it, and as a reminder, photos with a lot details in it may not work but of course give it a try if you like.

2. Go to the bottom of the Layers Panel and click the Adjustments Layers symbol (see below) and then click the Threshold option. (Using an Adjustment layers (instead of the Threshold filter in the Image menu), allows you to come back and tweak your adjustments at a later date, and you can usethe mask to hide certain parts if you like.)

1-threshold.jpg

The Threshold filter converts grayscale or color images into high-contrast, black-and-white images. You can specify a certain level as a threshold. All pixels lighter than the threshold are converted to white; and all pixels darker are converted to black. Simply adjust the sliders to your liking.

1b---threshold.jpg

3. Now add a new layer and move this so it sits between the Image layer and Threshold layer. Fill this new layer with 50% Gray, go to Edit menu> Fill> 50% Gray> OK
Change the blend mode to Overlay.

1-FILL.jpg

Your layers should now look like this:

3---look-like-now.jpg


4. Now we will add some grungy grain to our photo.
Working on the FILL 50% layer, click the Filter menu and select the Camera Raw Filter > Effects > Grain = 100%
Don't worry, you will just be seeing a gray screen at this point.
Click OK to return to your photo.

4---camera-raw-grain.jpg


5. You may not initially see any difference so duplicate the FILL layer two times, using CTRL+J. Keep duplicating the FILL layer until you are happy with the effect.

This is a close up of my photo with four (4) FILL layers:

5-close-up-with-4-fill-layers.jpg

Hint:
- you can also play around with blend modes on any of the FILL layers, change them up to see what effects you end up with! PLAY!! :)

And that is it!! :)

-----------------------------------------------------------------------------------------------------------------------------------------------
VARIATION ON TUTORIAL: In this instance, because we have added some FILL layers between the Background photo and the Threshold Adjustment layer, the Threshold effect might differ from it's original result as it is applying that filter to all of the layers beneath it.

If you want a more intense look for the Threshold filter (that is, keep the original Threshold effect) then;

a. At Step 2, BEFORE you create the first FILL layer, use CTRL+SHIFT+ALT+E to merge the Threshold Adjustment layer and Background layers together. (See example below)
b. Add another Threshold Adjustment Layer
c. Start the tutorial off as per above at Step 3 - Your layers would now look like this:

Variation-layers.jpg


Getting-more-intense-look-for-Threshold-filter-WEB.jpg
-----------------------------------------------------------------------------------------------------------------------------------------------

Creating a composite jpeg version:
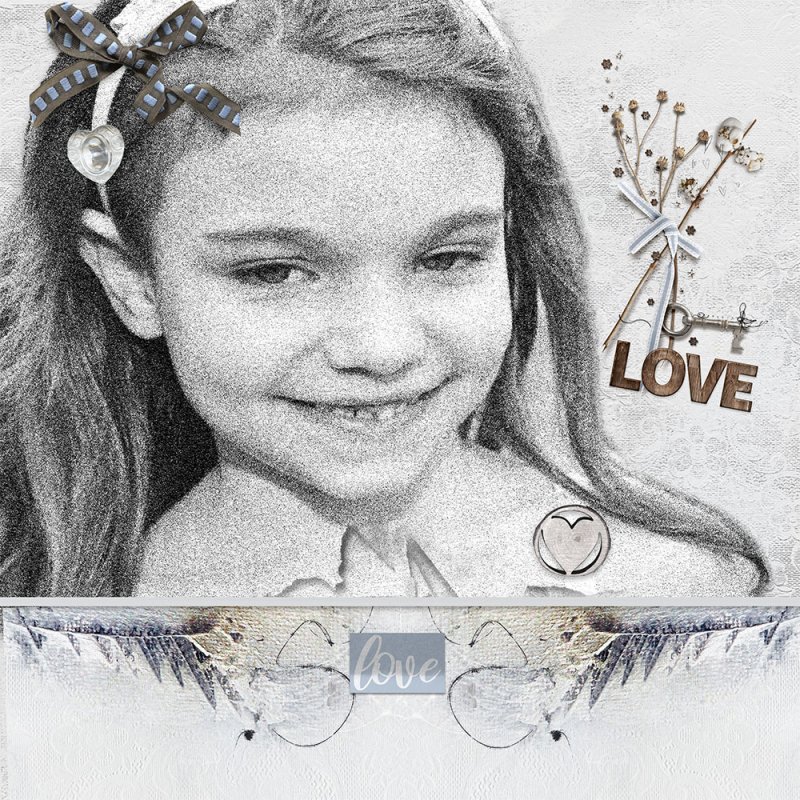
To create a composite jpeg photo version go to the very top visible layer in the layers panel and use CTRL+SHIFT+ALT+E. Then in the layers panel, CTRL+CLICK on the image, then copy (CTRL+C), click on the File menu and select New >Clipboard and then paste (CTRL+V) your photo. Merge the two layers together and save as jpeg file to use in your layout. With a white background remember to use a dark blend mode like Multiply, Color Burn or Linear burn when you are ready to scrap, in this way the white will disappear into the background paper you want to use. (That is what I did for my sample page below.)

TIP: If you want to, you can save your original photo file as a PSD file, and just replace the original photo with a new one and presto, you have created another grungy photo! If you want to do this, first go to the Background (photo) layer and double click on the padlock unlock it to turn it into a regular file. Save with a name like Working Template for Photocopy-Grunge effect.

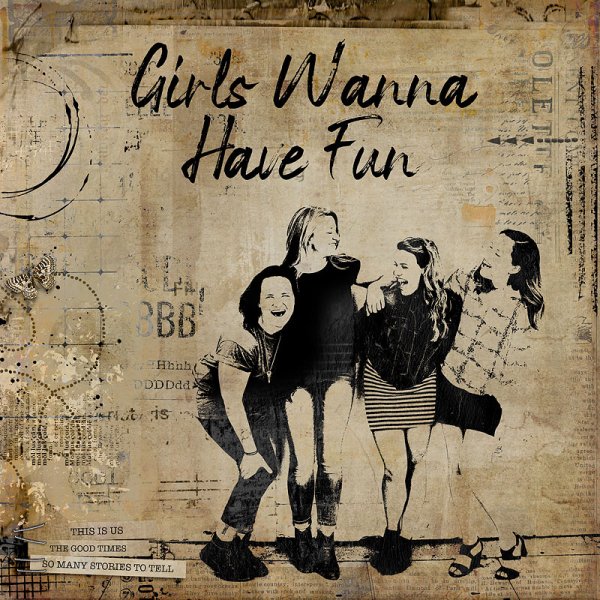
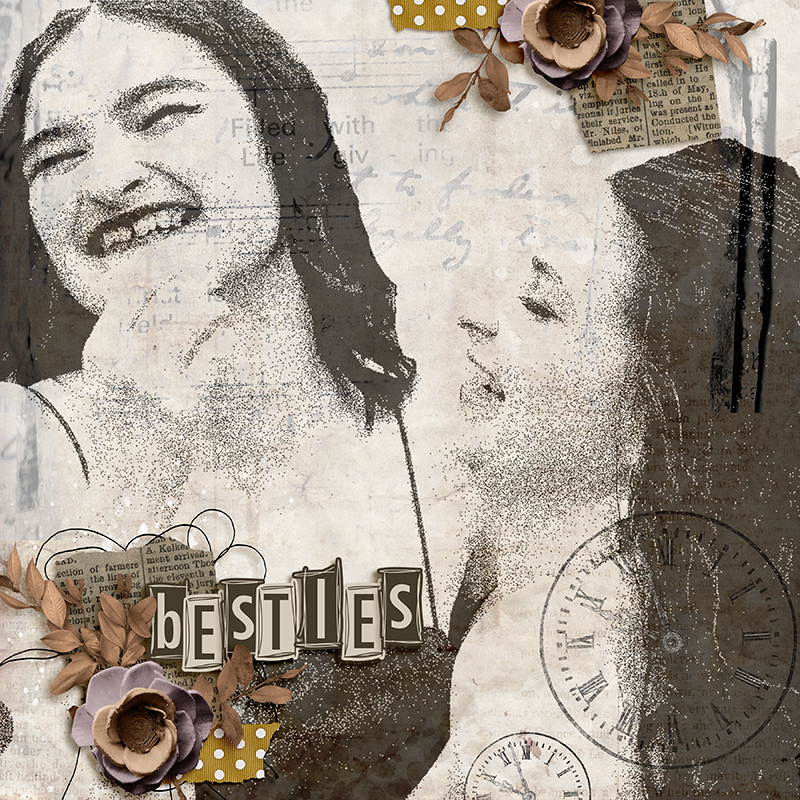
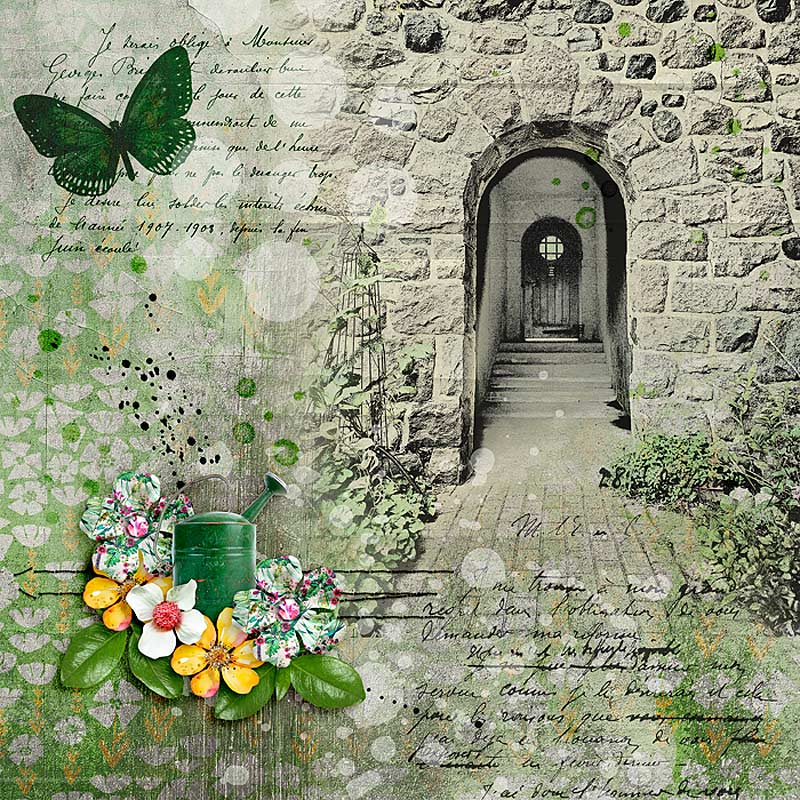
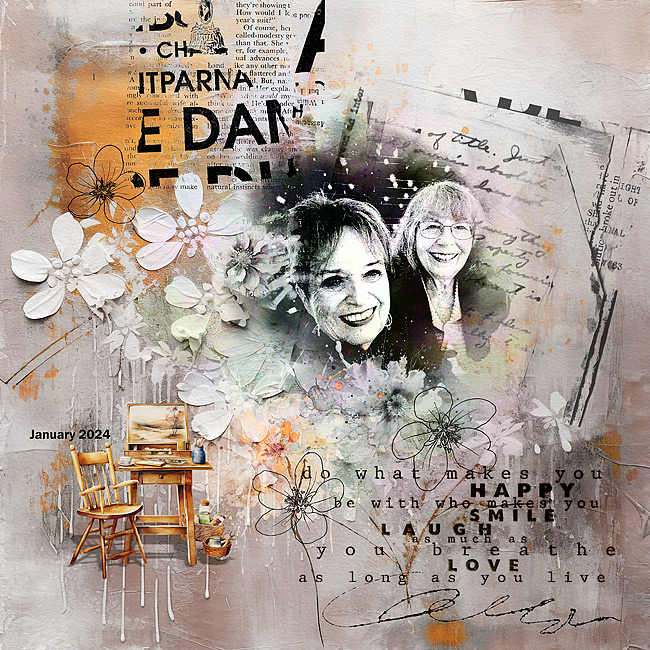
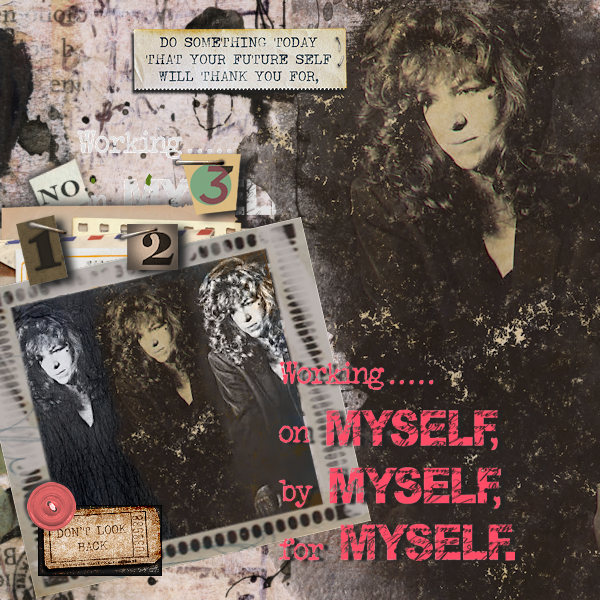
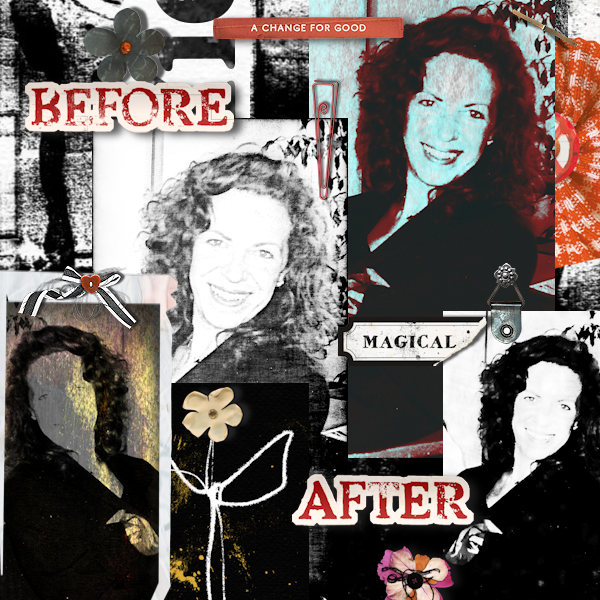
Here is one of my sample pages, I played with a few as I was having too much fun! lol! :)

12X12-AJ---FLY-AWAY.jpg
Credits are in the gallery

RULES:
- Follow the tutorial above to create a photocopied/grungy effect in Photoshop. For PSE and other program users, see what filters you have and play with them to get a similar grungy result (but please tell me what program and filter you used to do it). Scrap your photo in any way you wish. :)
- Please use 80% Oscraps products that are currently in the store.
- Non-Oscraps products or retired O designer products can be used whether the designer is selling elsewhere or not.
- You need to credit all the products used on your layout.
- Your layout can not be used for more than one challenge.
- Your page must be posted in the Challenge 1 gallery by midnight PST March 31, 2024 and linked back to this thread (see below on how to add your linked layout).
- And do not forget to update the CURRENT MONTH'S TRACKING THREAD to be eligible for your coupon.


I sure am excited about what you guys will come up with! You always create the coolest pages so looking forward to seeing them!!! ♥
 
Last edited:

Joansmor

Well-Known Member
When I click on File>New I don't see clipboard. Also when I try to combine the layers I get a different picture. But I think I would do better to merge layers.
 

pachimac

I solemnly swear I am up to no good!
CHEERY O
@wombat146 Your keyboard commands are for PC, right? What is the actual contextual menu item you choose when you do CTRL+SHIFT+ALT+E? The key commands are different on the Mac. Mine is NOT turning out the way yours is. LOL Are you merging layers?
 

wombat146

ONA - Administrator
CHEERY O
@wombat146 Your keyboard commands are for PC, right? What is the actual contextual menu item you choose when you do CTRL+SHIFT+ALT+E? The key commands are different on the Mac. Mine is NOT turning out the way yours is. LOL Are you merging layers?
hmm, I think the only key change would be that you used Command instead of Control and Option instead of the Alt key? Yes it is merging but flattens the layers underneath and places the flattened layer at the top of your layer panel (or where you pressed the keys) leaving the layers below still visible. Using the conventional merging tools will flatten all the layers and you won't be able to go back and tweak them. If your file becomes too 'messy', just pop those layers underneath into a folder. :)

Also, always use this key command above an active layer. If a layer is hidden, at the top of the panel, and you go to use this key command above it, then it won't work.

1709342189801.png

This enables you to then tweak the layers underneath if you need to later, BUT in order to see the differences make sure you have this flattened layer's visibility at the top turned off otherwise you don't see the changes. :) If you make changes and would rather the changed version, deleted your original flattened layer and press those keys again to incorporate them in a new flattened file.

Also, are you using a different photo? If so, remember that it may not look exactly the same, or you may need to add more (or less) duplicated layers of the FILL layer. These are the general steps but getting a similar result may just need some adjusting.

You can also try duplicating your photo layer and then go to the Filters Gallery and select the Graphic Pen filter, play around with sliders and see if you can then blend that layer into the one you have done with Threshold + Camera Raw + Grain effects above. :)
 

pachimac

I solemnly swear I am up to no good!
CHEERY O
When I click on File>New I don't see clipboard. Also when I try to combine the layers I get a different picture. But I think I would do better to merge layers.
Are you on Mac? The key commands are different.
hmm, I think the only key change would be that you used Command instead of Control and Option instead of the Alt key? Yes it is merging but flattens the layers underneath and places the flattened layer at the top of your layer panel (or where you pressed the keys) leaving the layers below still visible. Using the conventional merging tools will flatten all the layers and you won't be able to go back and tweak them. If your file becomes too 'messy', just pop those layers underneath into a folder. :)

Also, always use this key command above an active layer. If a layer is hidden, at the top of the panel, and you go to use this key command above it, then it won't work.


This enables you to then tweak the layers underneath if you need to later, BUT in order to see the differences make sure you have this flattened layer's visibility at the top turned off otherwise you don't see the changes. :) If you make changes and would rather the changed version, deleted your original flattened layer and press those keys again to incorporate them in a new flattened file.

Also, are you using a different photo? If so, remember that it may not look exactly the same, or you may need to add more (or less) duplicated layers of the FILL layer. These are the general steps but getting a similar result may just need some adjusting.

You can also try duplicating your photo layer and then go to the Filters Gallery and select the Graphic Pen filter, play around with sliders and see if you can then blend that layer into the one you have done with Threshold + Camera Raw + Grain effects above. :)
Thank you!! I can't believe I forgot that alt was the option key. I get it now. That key command keeps the layers and merge doesn't. Thank you for the clarification!
 

wombat146

ONA - Administrator
CHEERY O
See
When I click on File>New I don't see clipboard. Also when I try to combine the layers I get a different picture. But I think I would do better to merge layers.

Joan, see my note below for Susie, even if you are using Windows. There is a big difference between using the 'power' merge keys mentioned here and the normal CTRL+E keys (or Command + E).

Are you using Photoshop? Windows or Mac?

For the first question. So when you select something in Photoshop say using the rectangle tool, and you get those marching ants around your selection and then you copy it, when you then click on File > New > do you not see the Clipboard option shown below in red?

1709343543086.png
So that, when you have clicked OK, a new doc will open the same size as your selection so you can just paste it in? If you don't see it, and you are using Photoshop, I am at a lost as to why you can't see it. Let me know what program you are using Joan. :)
 

scrap-genie

Well-Known Member
I use PaintShop Pro (PSP) and went in my own direction. For the first pass I did a split channel to RGB which gave three version from which I chose the Green. Layered that with the original, did the intermediate gray with a texture effect. Created a jpg then and used two layers in the LO, bottom with soft light and upper with Luminance blend mode and some transparency. I know it has more detail than you wanted, but I got an effect that seems to work and was an adventure.


wombat146

ONA - Administrator
CHEERY O
I use PaintShop Pro (PSP) and went in my own direction. For the first pass I did a split channel to RGB which gave three version from which I chose the Green. Layered that with the original, did the intermediate gray with a texture effect. Created a jpg then and used two layers in the LO, bottom with soft light and upper with Luminance blend mode and some transparency. I know it has more detail than you wanted, but I got an effect that seems to work and was an adventure.

Great job Jean!! Well I am happy that you are experimenting and trying out new things, that is what these challenges are all about! ♥
 

Su_Sanne

Well-Known Member
I use PaintShop Pro (PSP) and went in my own direction. For the first pass I did a split channel to RGB which gave three version from which I chose the Green. Layered that with the original, did the intermediate gray with a texture effect. Created a jpg then and used two layers in the LO, bottom with soft light and upper with Luminance blend mode and some transparency. I know it has more detail than you wanted, but I got an effect that seems to work and was an adventure.

I use PSP too! I tried several local filters for example local tone mapping. This helps a lot. it takes a little more time to achieve similar results. Regardless, the important thing is that you get to know your program better. :)
 

pachimac

I solemnly swear I am up to no good!
CHEERY O
See


Joan, see my note below for Susie, even if you are using Windows. There is a big difference between using the 'power' merge keys mentioned here and the normal CTRL+E keys (or Command + E).

Are you using Photoshop? Windows or Mac?

For the first question. So when you select something in Photoshop say using the rectangle tool, and you get those marching ants around your selection and then you copy it, when you then click on File > New > do you not see the Clipboard option shown below in red?

So that, when you have clicked OK, a new doc will open the same size as your selection so you can just paste it in? If you don't see it, and you are using Photoshop, I am at a lost as to why you can't see it. Let me know what program you are using Joan. :)
It doesn't look the same in PS CC Mac...maybe that's why she's getting confused. Mac looks like this:

dialoguebox.jpg
 

Joansmor

Well-Known Member
See


Joan, see my note below for Susie, even if you are using Windows. There is a big difference between using the 'power' merge keys mentioned here and the normal CTRL+E keys (or Command + E).

Are you using Photoshop? Windows or Mac?

For the first question. So when you select something in Photoshop say using the rectangle tool, and you get those marching ants around your selection and then you copy it, when you then click on File > New > do you not see the Clipboard option shown below in red?

So that, when you have clicked OK, a new doc will open the same size as your selection so you can just paste it in? If you don't see it, and you are using Photoshop, I am at a lost as to why you can't see it. Let me know what program you are using Joan. :)
I finally saw the clipboard. Just never done it this way. I usually duplicate the layer on a new file. But no matter how I combined the layers I seemed to lose the effect the Threshold has on the picture mostly. I just used what I got.
 

pachimac

I solemnly swear I am up to no good!
CHEERY O
I finally got to sit down and do it!! I love the result!


AZK

Queen of the Universe
CHEERY O
Here's my take on the challenge. I'm using PSE 2019. The paths I tried for the grainy effect were
Filter>Artistic>Film Grain and Filter>Texture>Grain since the Camera Raw option isn't present in the Filter menu. I deleted one and kept the other, but I don't remember which was which, lol.

For the record, I have the same problem @Joansmor mentioned about losing the desired threshold effect. This is what I saw on my screen and wanted to use:

example-2.jpg

This is what happens when I use Ctrl>Shift>Alt>E:

example-1.jpg

I just went with it, and here is my layout:


Great challenge! I love learning new techniques but don't always take the time to do so.
 

wombat146

ONA - Administrator
CHEERY O
I finally saw the clipboard. Just never done it this way. I usually duplicate the layer on a new file. But no matter how I combined the layers I seemed to lose the effect the Threshold has on the picture mostly. I just used what I got.
Joan, using the Clipboard like that is when you want to copy a layer from one PSD document to create a totally new PSD/jpeg document. If you are just copying/duplicating a layer within the PSD document then you would certainly use CTRL+J. :)

And I love your result on your photo! ♥
 

wombat146

ONA - Administrator
CHEERY O
For everyone, if you end losing some of the Threshold effect take a look at Post #1, there is a slight variation to the tutorial if you want to try it. :)
 
  • Like
Reactions: AZK

easyeyes4you

Well-Known Member
Boy everyone sure jumped on this one....I have been playing, have a few things in the works...got interrupted with life... yep at midnight!!! So many notes and hints, here now, I will come back tomorrow, and read them all... and get something posted.... Love learning new things. My problem is finding appropriate images....
 

Christi

Well-Known Member
Thanks for the lesson Ona, I swapped a couple of photos in and it works quite well but I don't have many photos that work with it I will have to hunt them down as it is an interesting process!
Done in PSE23
working from bottom
Photo
Adjustment layer 1 threshold with luminosity and opacity of 63%
Adjustment layer 2 threshold with dissolve set at opacity of 65%
lth_anewdayhascome_p_06.jpg with hard light
LA_outback-p01.jpg with hue
All add up to the background .
Added elements from Lynne Anzelc’s Outback.
 

easyeyes4you

Well-Known Member
I am blending the photo into the background, looking at all the blending modes, but that does not seem to be what you and others are doing... I did try the saving thing, and got to the point of merging and had no idea what I was merging... I did get the clipboard, but wasn't sure what to do with it... Struggling very hard to understand this concept, totally new to me... Love you clear instructions...

I am liking the brown sepia toned blend modes... but the challenge was for a bit grungier...
 

Su_Sanne

Well-Known Member
Thank you, Ona, for this Challenge.
A Photoshop tutorial with creative techniques is always a challenge for my Paint Shop program. I worked with PSP filters Aged Photos, Grayscale, but also Filter Forge Grunge, Sketch filters and my favorite tool, Be Funky. There are different settings for grunge here. Even though I wasn't able to work out the specifications exactly, I still enjoyed this challenge.


I did another one. In addition to preparing the photo, I tried out some grunge filters from Be Funky. You can achieve a lot here.

 
Top