PHOTO EDITING: Making your photo POP
If your photo taking skills are equal to mine you sometimes need help making a photo look a bit better. One of the things I use to make my photos pop is a combination of curve adjustments and the gradient map adjustment filter. Curves adjustment can be used to lighten or darken a photo or even change the color. Gradient map adjustment uses the colors in your photo and remaps them according to the light, dark and midtones. Used along with blending modes and the opacity lever you can add depth and interest to an otherwise flat photo.
Here’s my before photo of my grandsons, taken in a shaded, as you can see it doesn’t have much contrast and looks a bit flat. What I want to achieve is to warm up the photo and have a bit more contrast in the photo.
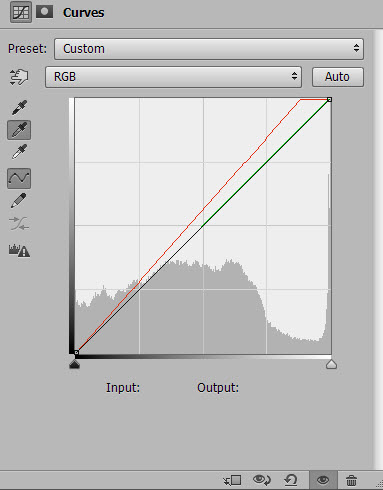
We’ll start with the curves adjustment using the eye drop tools available in the curves adjustment. To access the curves adjustment click on your adjustment layer icon on the bottom of your layers pallet. Choose your Curve adjustment.
We’ll be using the three eye droppers to adjust my blacks my mid tones and my highlights. I chose my highlight dropper first and clicked on the lightest part of Eli shirt.
Here is the example of what changes took place with the highlight dropper. Already it’s brighten up the photo, but still needs some contrast.
Next I used my Midtone dropper, the one in the middle, I sampled the gray area in Eli’s hat. It warmed it up quite a bit.
For the dark dropper I sample the dark area in Lucas shirt. The result is pretty good, but I wanted the skin to have a warmer tone.
Next I used the gradient map adjustment layer, chose a dark to pink gradient, used the Soft Light blending mode and change the opacity to 65%.
This warmed the skin tones up a bit.
So as you can see it went from flat tones to a picture that has contrasts as well as added warmth.
Have fun experimenting with your curves adjustment layers.


