How to Convert a 8.5 x 11″ Template to a 12 x 12″ Template and Vice Versa
When I began digital scrapping, the most popular paper size was 8.5 x 11″. Not too long after that, 12 x 12″ became more popular, and the industry standard.
No matter what size you prefer to scrap with, you can easily convert templates to the size you need using 1 of 2 techniques:
Technique 1:
The fastest way to convert a template to a different size is by using Image > Image Size in Photoshop and Image > Resize > Image Size in Photoshop Elements. Enter the Dimension Size you want in the Image Size dialogue box that opens.
The only downside of using this method is that the embellishments and photomasks on the template are typically distorted. This is based most especially upon what size you are converting to or from.
For this tutorial, I am using a template from Templates Vol 9 by Mediterranka. In the image below I have used this method to convert a 12 x 12″ template to an 8.5 x 11″ template. In doing so, the original shapes are distorted.
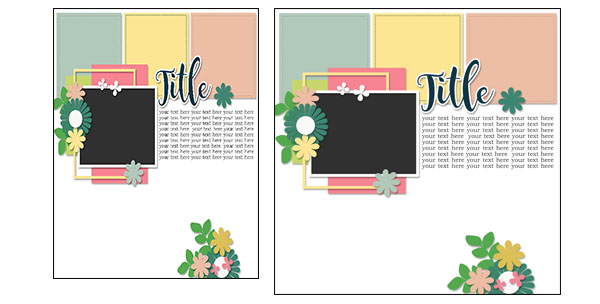
You can use the template as it is, once it’s been converted; or if you want to maintain the shape integrity of the original layout, you can manually make adjustments to the template shapes.
Technique #2: the Manual Method
- Open a 12 x 12″ template in Photoshop or Photoshop Elements
- Create a new Blank Document 8.5 x 11″ in size. (I don’t like working with Tabs, so my screen looks like this with floating documents):

- Click on the first layer of the template; hold down Shift; click on the last layer of the template. This will select all of the layers.
- Hold down the Shift + V, while dragging the highlighted layers from the Template to the blank document. With the use of this keyboard shortcut, the template layers will drop in the same place in the blank document, thus in the middle of the page. This will make it easier for adjustments to be made.
- Close the original template, as it is no longer needed.
- Press Control + T to bring up the Transform Tool. You will see the entire 12 x 12 document as it sits on the 8.5 x 11″ canvas.
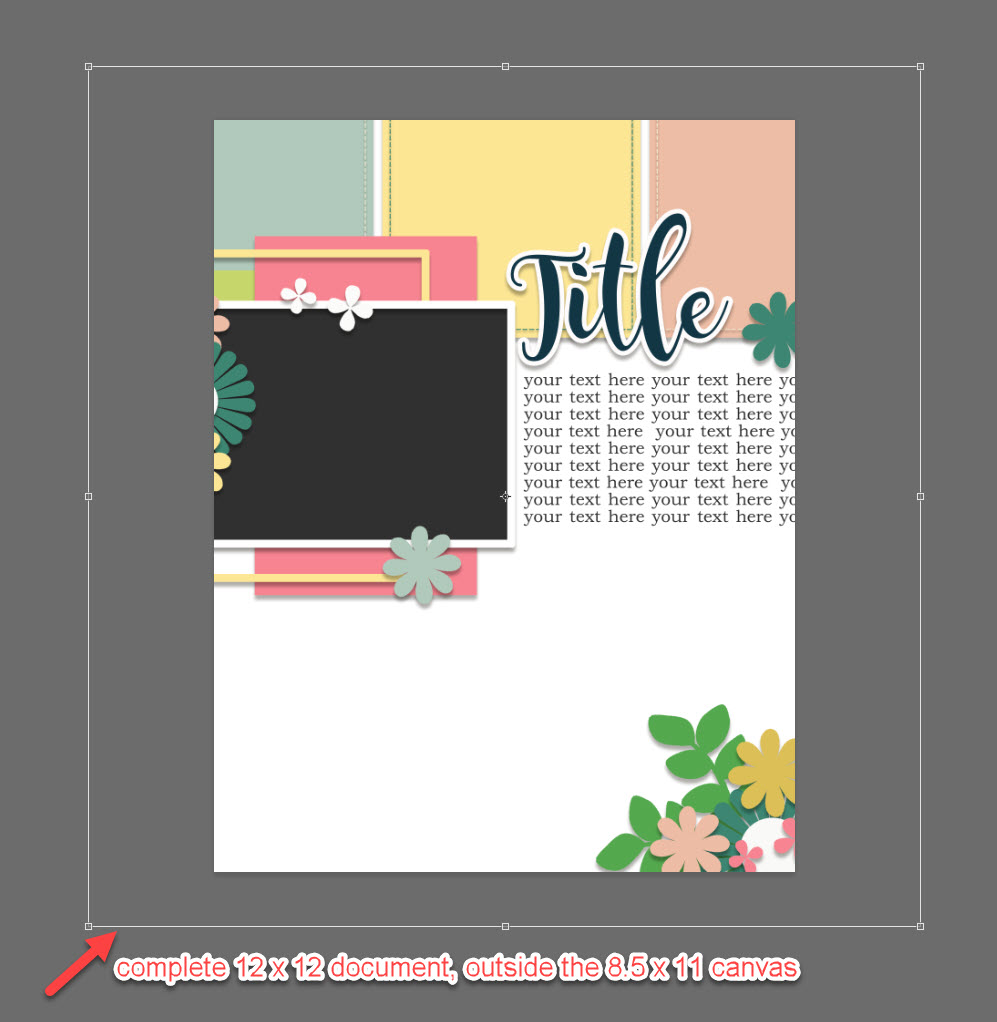
In Photoshop, press and hold Shift +Alt , and with your mouse grab one of the Transform corners. Drag inward until you see the entire template on the blank page. (I placed a small black stroke around the edge of the template to make it easier for you to see the document dimensions.)

Using this method the original shapes are not distorted and the shape integrity is kept intact. In this particular template, the cluster toward the bottom would need to be moved further down the page.
Conversely, we can also easily convert any size template to a 12 x 12″ by dragging the entire template out to the edges of the 12 x 12″ canvas (rather than dragging in, as we do to make the template smaller).
If you prefer using a Photoshop Action to help with the process, Wendyzine has several products that can help.
Please note that Wendy updated them for 2019 to add new options.
Wendy will also be uploading to the store very soon, Actions that will convert a Letter and A4 size template to the 12 x 12″ size.
I hope you find this helpful!
Karen Schulz
Karen Schulz Designs
definately an easier way to do that. I use PSE, all I do when I want to resize something like that is highlight all the layers (in the layer tray) link them together, and go to resize, where I adjust the whole canvas from any size to the 12 inch format (or whatever sizes I am converting)
Then I just unlink the layers, and there I am, a 12 inch layout with boxes already resized. You can always adjust any box afterward if needed.
Hi Angela, Thank you for your feedback. I haven’t had the same experience you describe. I’m out of town until Monday but will get back to this then and update this post. Maybe I’m missing something obvious.Thanks!
Thanks Angela. This works perfectly.