Hi everyone, this tutorial is in response to a question about how to use some photo frames created by Natali, of Natali Designs.
Like anything to do with Windows, there are different ways of doing things, and what I will show you here is simply my way of using these frames. Other people will have their own way but the end result will be the same")
I am using Photoshop CC2020 but people with Elements should be able to use the same steps. My apologies to those that are using a different program, but you are more than welcome to pop in here and share the process you use as it may well help someone else.
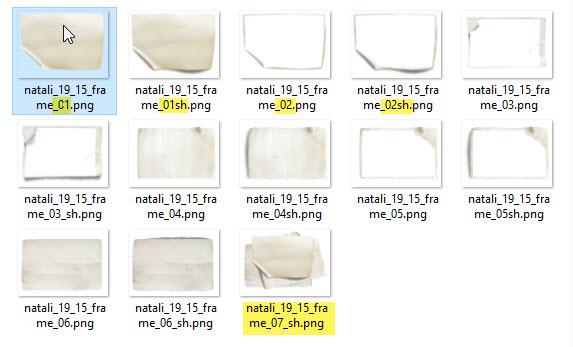
Firstly, let's have a look at the actual files themselves. You will see that they are in PNG format and that there are two variations of each file style, one without a shadow and one with a shadow ie. natali_19_15_frame_05 and natali_19_15_frame_05sh. Each style has the outer frame and the inner photo mat that can be used to clip your photo to. A lot of these styles can be used together to create a variety of combinations.
In the examples below you can see 5 different combinations I have created. I have also included an image of what my layers look like for each combo.
Combo 1:
As you can see in the layers panel, I have used two of the frames:
natali_19_15_frame_02sh - this is an outer frame with a shadow
natali_19_15_frame_01 - this is the inner photo mat file (no shadow) that I clipped my photo to

Combo 2:
In this example I used two frames with shadows, which resulted in darker and more pronounced drop shadow
natali_19_15_frame_03sh - out frame/shadowed
natali_19_15_frame_06sh - inner photo mat/shadowed

Combo 3:
For this combo I once again used one frame with a shadow and one without.
natali_19_15_frame_05sh
natali_19_15_frame_04

Combo 4:
This combo is exactly the same as Combo 3 but I just added the frame natali_19_15_frame_07_sh at the bottom of the layer stack...... this gives the effect of lots of frames underneath with the photo on top.

Combo 5:
Different photo frames on top but the last photo frame is the same as in Combo 4 above.
natali_19_15_frame_02
natali_19_15_frame_01sh
natali_19_15_frame_07_sh

There you have it, not very hard at all and lots of fun creating different combinations as well.
Note: You can always create your own clipping masks for these types of frames, just as you would any other type of frame.
Creating your own clipping masks to use with these frames:
1. Move the photo frame you want to use into Photoshop
2. Create a blank layer under this photo frame layer
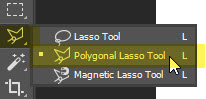
3. Working on the photo frame layer, select the Polygonal Lasso tool
4. Use the tool to click around the photo frame, does not need to be precise
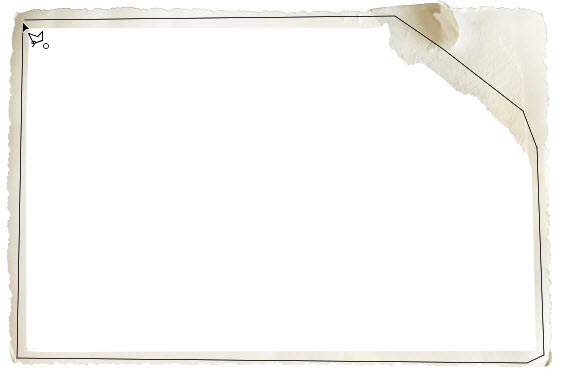
When you complete your outline the marching ants will appear.
5. Click on the blank layer you just created under the photo frame and use ALT+BACKSPACE to fill this shape in with colour - doesn't matter what colour is in your foreground colours, this is what you will clip your photo to so you won't see the colour.
6. Now bring your photo in, position above the now filled in shape and clip it to the mask you just created.
7. Selected all three layers and link them together so you don't move one by mistake.
If you have any questions then please ask away! More than happy to help!
0
0
0
0
0
0
0
0
0
0
0
0
0
0
0
0
0
Like anything to do with Windows, there are different ways of doing things, and what I will show you here is simply my way of using these frames. Other people will have their own way but the end result will be the same
I am using Photoshop CC2020 but people with Elements should be able to use the same steps. My apologies to those that are using a different program, but you are more than welcome to pop in here and share the process you use as it may well help someone else.
Firstly, let's have a look at the actual files themselves. You will see that they are in PNG format and that there are two variations of each file style, one without a shadow and one with a shadow ie. natali_19_15_frame_05 and natali_19_15_frame_05sh. Each style has the outer frame and the inner photo mat that can be used to clip your photo to. A lot of these styles can be used together to create a variety of combinations.
In the examples below you can see 5 different combinations I have created. I have also included an image of what my layers look like for each combo.
Combo 1:
As you can see in the layers panel, I have used two of the frames:
natali_19_15_frame_02sh - this is an outer frame with a shadow
natali_19_15_frame_01 - this is the inner photo mat file (no shadow) that I clipped my photo to
Combo 2:
In this example I used two frames with shadows, which resulted in darker and more pronounced drop shadow
natali_19_15_frame_03sh - out frame/shadowed
natali_19_15_frame_06sh - inner photo mat/shadowed
Combo 3:
For this combo I once again used one frame with a shadow and one without.
natali_19_15_frame_05sh
natali_19_15_frame_04
Combo 4:
This combo is exactly the same as Combo 3 but I just added the frame natali_19_15_frame_07_sh at the bottom of the layer stack...... this gives the effect of lots of frames underneath with the photo on top.
Combo 5:
Different photo frames on top but the last photo frame is the same as in Combo 4 above.
natali_19_15_frame_02
natali_19_15_frame_01sh
natali_19_15_frame_07_sh
There you have it, not very hard at all and lots of fun creating different combinations as well.
Note: You can always create your own clipping masks for these types of frames, just as you would any other type of frame.
Creating your own clipping masks to use with these frames:
1. Move the photo frame you want to use into Photoshop
2. Create a blank layer under this photo frame layer
3. Working on the photo frame layer, select the Polygonal Lasso tool
4. Use the tool to click around the photo frame, does not need to be precise
When you complete your outline the marching ants will appear.
5. Click on the blank layer you just created under the photo frame and use ALT+BACKSPACE to fill this shape in with colour - doesn't matter what colour is in your foreground colours, this is what you will clip your photo to so you won't see the colour.
6. Now bring your photo in, position above the now filled in shape and clip it to the mask you just created.
7. Selected all three layers and link them together so you don't move one by mistake.
If you have any questions then please ask away! More than happy to help!
0
0
0
0
0
0
0
0
0
0
0
0
0
0
0
0
0
Last edited:

") )
)