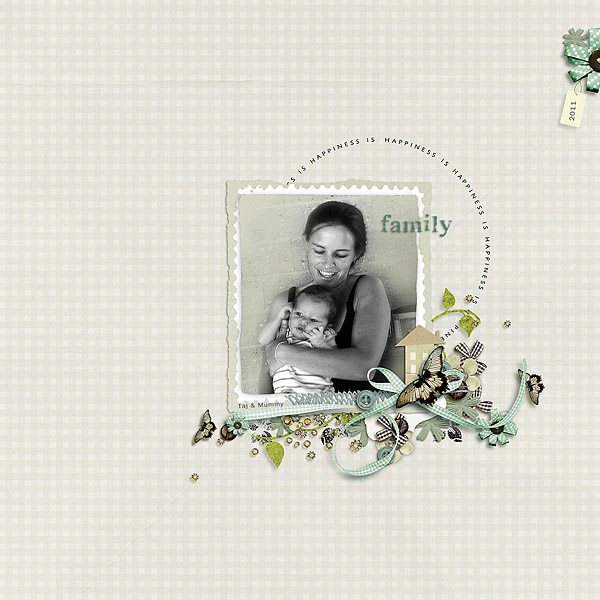
In Part 2 of this tutorial I will be adding some more elements to the cluster created in Part 1. Remember to keep in mind the cluster rule of using odd numbered items where possible and varying the size and direction of some of the items to add more interest. Try to keep your colours balanced as well.
I have also included some info on the basics of creating shadows but these days you can purchase pre-made shadows so please skip over that bit if you want to. I am itching to actually go back to this layout and change some of the shadows as my style has changed so much over the years but I will desist!! lol!
----------------------------------------------------------------------------------
CREATING SHADOWS
Two things to remember in regards to creating shadows:
*As a rule of thumb, the closer the object is to the light source, the darker it's shadow will be. The further away the object is, the lighter the shadow will appear.
*Think about the object itself, if it dense, then its shadow will appear more solid. For example, think of vase of flowers with the light source shining from one side. The shadow cast by the vase itself may be more denser than the shadow(s) cast by the flowers themselves.
This tutorial was originally created for using with PSE. In PS and PS CC the settings are virtually the same but PS does have a couple more settings that can be used as well. There are many ways of creating shadows, this is just one way to do it using the in-built shadows that come with PSE.
So onto the tutorial for creating Shadows.


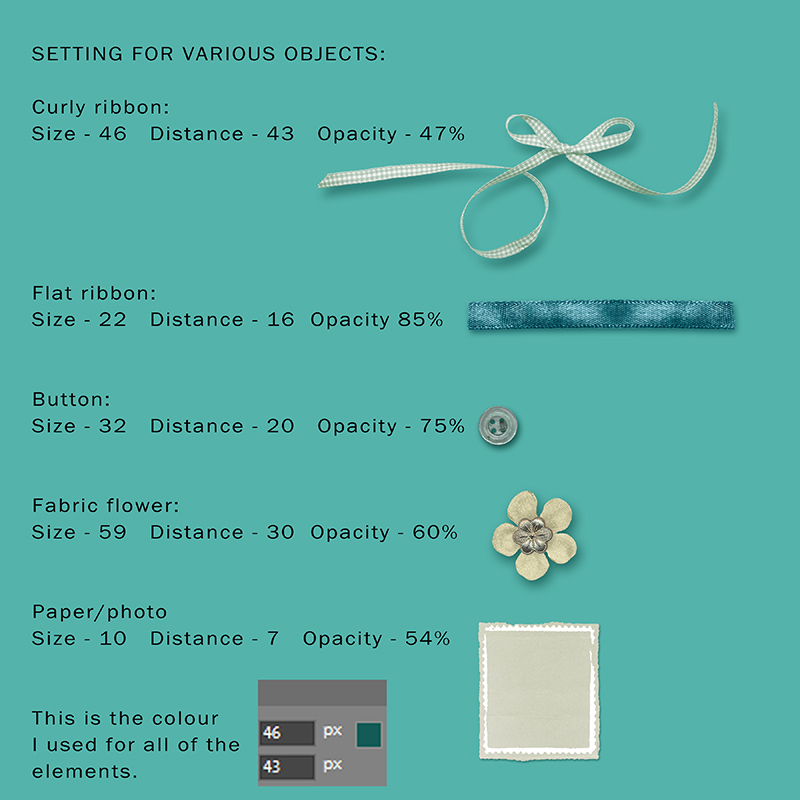
 These are the drop shadows I used for the elements on my layout:
I normally apply my shadows at the end of my creating process, and I tend to work with everything that appears in the background first. These will have a darker shadow as they are closest to the background. I then work my way up, the elements in the middle distance will have a slightly lighter shadow than the background ones and then the elements that appear right at the top will have a lighter shadow again.
Just think of a desktop with a heap of things placed on it. The things down the bottom will have darker shadows and will be closer to the item, so less blurred, while the things at the top of the pile will have lighter looking shadows and generally will have more softer/blurred shadows.
The difference between the bottom layers and the top layers will however be minimal, just a small degree of change so it doesn't contrast too much.
PLEASE ask any questions you have or if I haven't explained something well enough. Hope you have fun!!")
I have also included some info on the basics of creating shadows but these days you can purchase pre-made shadows so please skip over that bit if you want to. I am itching to actually go back to this layout and change some of the shadows as my style has changed so much over the years but I will desist!! lol!
----------------------------------------------------------------------------------
CREATING SHADOWS
Two things to remember in regards to creating shadows:
*As a rule of thumb, the closer the object is to the light source, the darker it's shadow will be. The further away the object is, the lighter the shadow will appear.
*Think about the object itself, if it dense, then its shadow will appear more solid. For example, think of vase of flowers with the light source shining from one side. The shadow cast by the vase itself may be more denser than the shadow(s) cast by the flowers themselves.
This tutorial was originally created for using with PSE. In PS and PS CC the settings are virtually the same but PS does have a couple more settings that can be used as well. There are many ways of creating shadows, this is just one way to do it using the in-built shadows that come with PSE.
So onto the tutorial for creating Shadows.
I normally apply my shadows at the end of my creating process, and I tend to work with everything that appears in the background first. These will have a darker shadow as they are closest to the background. I then work my way up, the elements in the middle distance will have a slightly lighter shadow than the background ones and then the elements that appear right at the top will have a lighter shadow again.
Just think of a desktop with a heap of things placed on it. The things down the bottom will have darker shadows and will be closer to the item, so less blurred, while the things at the top of the pile will have lighter looking shadows and generally will have more softer/blurred shadows.
The difference between the bottom layers and the top layers will however be minimal, just a small degree of change so it doesn't contrast too much.
PLEASE ask any questions you have or if I haven't explained something well enough. Hope you have fun!!
Attachments
Last edited: