Tip: Correcting too dark photos a bit
When you don’t photograph in RAW, but only in JPEG, you are a bit limited in the possibilities of correcting things.
There are ways in Photoshop to make some corrections.
Sometimes a photo is a bit too dark. I found out a lot of printing services give a little bit darker print than what I see on my calibrated monitor.
So I often make my photos a tad lighter to get the best result in my albums.
One of the easiest ways to do it is with the use of one of the blending modes, Screen.
Let me show you with this photo of mine:
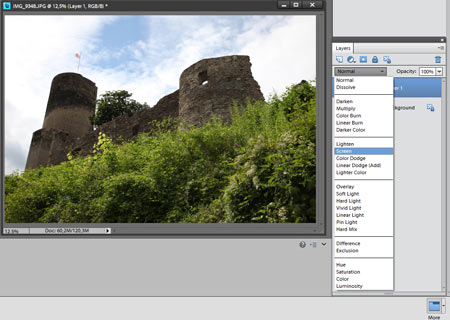
I copied this photo layer and choose the blending mode Screen.
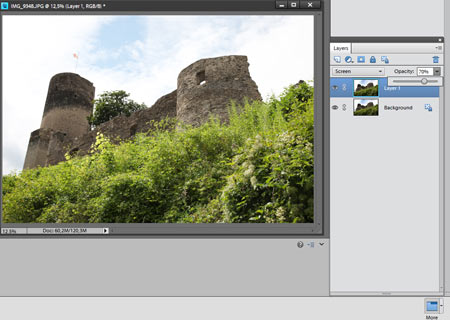
When it’s too bright, you can lower the opacity, just drag the slider to the left and stop when you think it’s nice.
I stopped at 70%, but it can be very different with your photo.
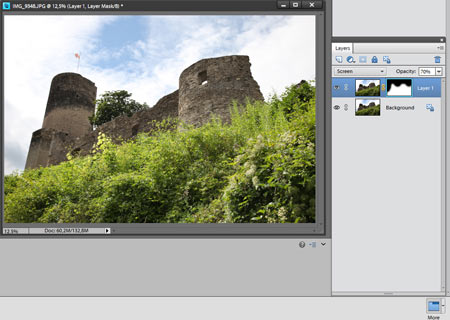
The sky looks already bright on the original and I want to keep the blue, so now I am going to use a layer mask to get the original back.
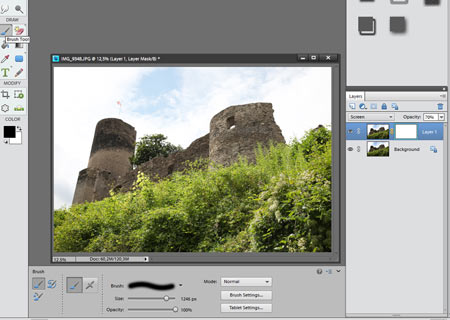
Hit the layer mask button to get a white layer mask.
Now I choose the brush tool and the color black to erase the sky part. Make sure the mask is highlighted when you start drawing!
With black as your foreground color you can remove things, with white you can brush things back again.
And now I have a photo I like! A brighter looking castle and the sky still is blue!


This is a great tip! I often use levels for fixing dark photos, but then I lose the sky color! Never thought about this way to bring the sky color back! Will definitely try this! Thank you Irene!