digiscrapper
Pictures, please
Is there an action for PSE that will convert a profile picture into a 4 color Andy Warhol effect? I think (maybe not) that an earlier version of PSE had that as an option. I made a few for fun and it wasn't very hard.

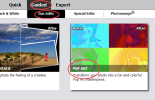
Hi there, yes there used to be option in PSE that gave you Andy Warhol type effects, it was under the Guided tab and it can be found within the Fun Edits tab and was called Pop Art - this is in PSE14.Is there an action for PSE that will convert a profile picture into a 4 color Andy Warhol effect? I think (maybe not) that an earlier version of PSE had that as an option. I made a few for fun and it wasn't very hard.


Thanks, Amanda, I don't have the full version of Photoshop, just Elements, but I will give it a try!Not my tutorial, but thought it worth sharing.
Add some “POW!” to your photos with the pop art effect in Photoshop.
To create this special effect, you’ll need to separate your subject and background and work in various layers along the way. Here’s how to make a Warhol pop effect in Photoshop.
- Open your image in Photoshop. Name this layer “Background.”
- Separate your subject. Use the Pen tool to trace your subject, then copy it onto a new layer. Rename this layer “Subject.”
- Add color fill to your background. Select the Background layer and tap New Fill to change the background to a solid fill color.
- Remove detail from the subject. To select your Subject Layer, go to Menu Image > Adjustments > Threshold and open the Threshold dialog box. This will make your subject black and white. Adjust the slider to remove most of the detail, consistent with the pop art style.
- Prepare for color. Experienced users like the Pen tool to select and separate different portions of the subject where they want to add color — such as the hair, skin, and clothing. Those newer to Photoshop might want to use the Lasso tool or the Magic Wand on the original image to adjust the tolerance. Another beginner option is to use the Quick Selection tool on the original image, create a new layer, and fill with a color using Edit > Fill. This is a fast way to select items such as a shirt or hat, or other well-defined areas. For every different area of color, you’ll want to create a new layer.
- Add color. Once you’ve made your selection, you’ll need to click on that layer to add color. If you use a Selection tool, click new layer, and then Edit > Fill. If you’re using the Pen tool, you’ll want to add a new layer, create the path, go to the path tab, and right click on it. Choose Fill Path, select a color, and click OK. You can then return to the Layers tab. Repeat for every individual layer, including the Subject and Background layers.
- Finish with Blend. After selecting a color for an area, tap on that layer’s Blend mode pop-up menu and change the selection from Normal to Multiply. This will bring back black threshold details from earlier to finish the pop art effect.
Thank you very much! I will look to see if I still have my PSE 14 disk. Perhaps it was discontinued due to copyright issues.Hi there, yes there used to be option in PSE that gave you Andy Warhol type effects, it was under the Guided tab and it can be found within the Fun Edits tab and was called Pop Art - this is in PSE14.
View attachment 386807
The Guided tab was a great way to apply certain filters to your photo using easy steps that would automatically be carried out for you when you clicked on the button. But I am not sure if this is available in versions after PSE14, perhaps some of our PSE users can let us know if it is still available?
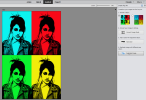
I just had quick go
View attachment 386808