AK_Tracy
Well-Known Member
Hello Everyone.
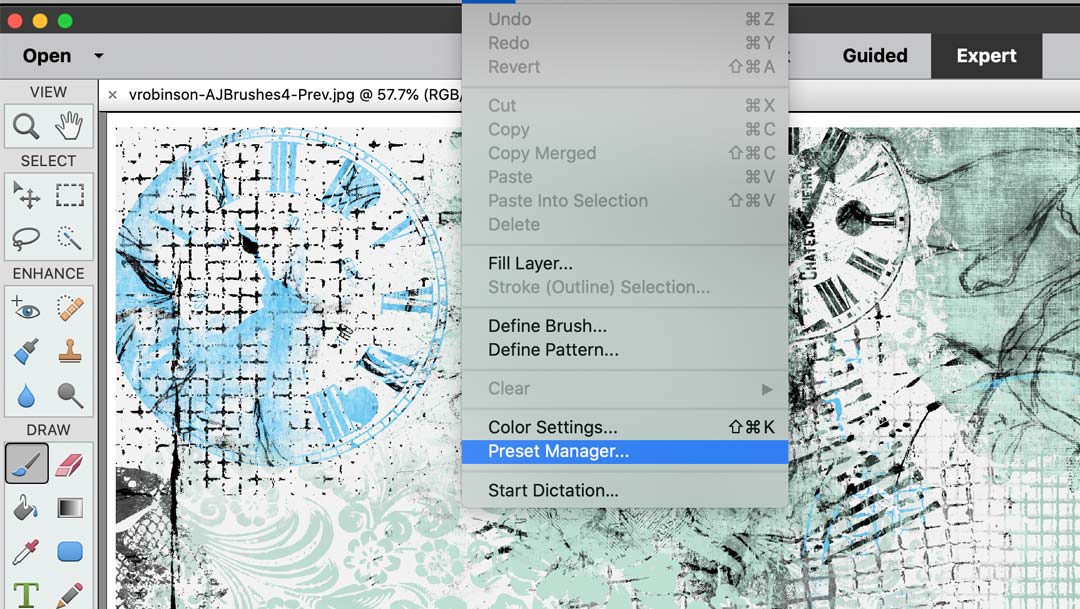
I bought PSE last April 2023. This was all new to me then. Well okay still is mostly new to me. I have been branching out to brushes and what they can do I watched some videos and I see that in PS you can have your brushes in the program but for PSE I have to load the brush one at a time. This is time consuming and annoying. Is there a better way to store/load brushes I dont know about? What am I missing? Is this how PSE does things? One brush at a time? If that's the case how do you organize your brushes? Right now they are just in the kit they came with and searching a brush is a pain in the butt. I know I have brushes that I haven't used because I cant find them or I don't know what they are, its just a brush icon LOL. Hope this makes sense. I need to know
1. Does PSE allow more then one brush? (Beside the pre set ones)
2. How do you organize the brushes?
3. Can you add an image to brush icon like you do folders?
Thanks so much for the help!
I bought PSE last April 2023. This was all new to me then. Well okay still is mostly new to me. I have been branching out to brushes and what they can do
I watched some videos and I see that in PS you can have your brushes in the program but for PSE I have to load the brush one at a time. This is time consuming and annoying. Is there a better way to store/load brushes I dont know about? What am I missing? Is this how PSE does things? One brush at a time? If that's the case how do you organize your brushes? Right now they are just in the kit they came with and searching a brush is a pain in the butt. I know I have brushes that I haven't used because I cant find them or I don't know what they are, its just a brush icon LOL. Hope this makes sense. I need to know1. Does PSE allow more then one brush? (Beside the pre set ones)
2. How do you organize the brushes?
3. Can you add an image to brush icon like you do folders?
Thanks so much for the help!


 I just discovered what they will do and you already tempt me with more. (good job and thank you)
