Oscraps
Recent content by beszteri
-

Comment by 'beszteri' in media 'Anna Color challenge 8-10.jpg'
IT looks gorgeous! ♥️- beszteri
- Gallery comment
-
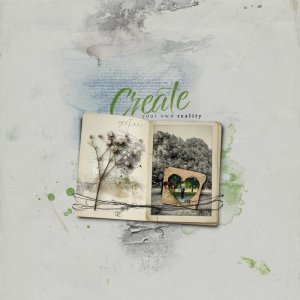
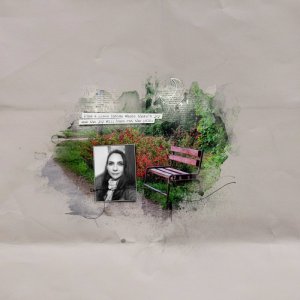
anna-apsnes-digital-scrapbook-artplay-fernweh-collection-beszteri-reality
Creating process: 1. I started with a solid paper. 2. I put the book and I added a Drop Shadow... layer style to it. 3. I chose the photo and I duplicated it. I trnasformed the second layer to Black and White. 4. I placed the frame and I cut the colored photo layer to it. 5. I put some transfers...- beszteri
- Media item
- aa travel
- Comments: 6
- Category: Anna Aspnes
-
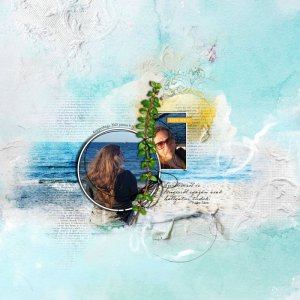
anna-aspnes-digital-scrapbook-artplay-collection-abrazo-beszteri-sea
Creating process: 1. I started with a solid paper as the foundation of my page. 2. I chose the first photo. I put some photoblendz overlays under the photo and created a group of them, then I cropped the photo to the group. I converted the fotoblendz group and the photo layer to a smart object...- beszteri
- Media item
- Comments: 8
- Category: Anna Aspnes
-

anna-apsnes-digital-scrapbook-artplay-flaneur-collection-beszteri-spring_1000.jpg
Creating process: 1. I started with a solid paper as the foundation of my page. 2. I placed a FotoBlendz and clipped my first photo to it. I duplicated the photo layer, and used the Select/Subject tool to select the flower, then I applied a layer mask. Then I applied a DropShadow layer style...- beszteri
- Media item
- Comments: 7
- Category: Anna Aspnes
-
-
Comment by 'beszteri' in media 'Inverdoorn'
Love all the white space here! ♥- beszteri
- Gallery comment
-
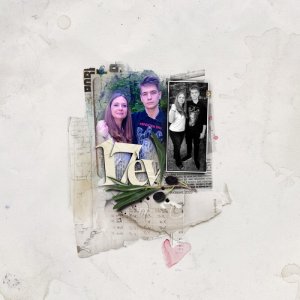
anna-aspnes-digital-scrapbook-artplay-collection-homemade-beszteri-17
My son turned 17 at the start of May and my younger sister took a photo of us. creating process: 1. I started with a solid paper (as usual). 2. I placed some FotoBlendz masks and created a group from them. 3. I clipped our photo to the group. 4. I placed some transfers and overlays behind the...- beszteri
- Media item
- Comments: 8
- Category: Anna Aspnes
-
-
Comment by 'beszteri' in media 'AnnaLift Challenge 04.14.23 - 04.28.23 "Bicycle"'
So artsy and creative, love it!- beszteri
- Gallery comment
-
Comment by 'beszteri' in media 'Anna lift 4-28.jpg'
Outstanding! ♥ LOVE it!- beszteri
- Gallery comment
-
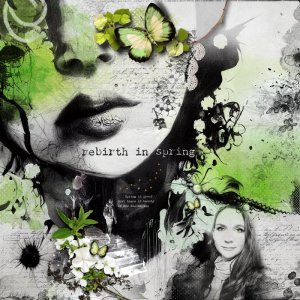
anna-aspnes-digital-scrapbook-value-pack-no-4-beszteri-spring
Well... while I created this page I had absolutely no idea what I would do. I had only feelings of spring, the several greens of spring, the blooming flowers and the rebirth (both of nature and me). So I have a little problem with the writing of creating process... :) I just added the...- beszteri
- Media item
- Comments: 8
- Category: Anna Aspnes
-
anna-aspnes-digital-scrapbook-artplay-collection-to-the-moon-beszteri-place
Creating process: 1. I started with a solid paper as the foundation of my page. 2. I chose a photo, then I placed 2 FotoBlendz overlays, created a Group from them and clipped the photo to the group. 3. I duplicated the photo layer, and on the upper layer I applied Filter/Stylize/GlowingEdges...- beszteri
- Media item
- Comments: 4
- Category: Anna Aspnes
-
-
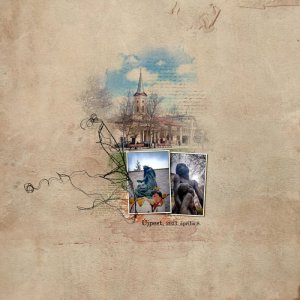
anna-aspnes-digital-scrapbook-artplay-collection-tresbon-beszteri-ujpest_1000.jpg
Creating process: 1. I started with a solid paper. 2. I found that rainy photos fit well to this paper, so I chose 2 of my photos I took that day. I added Stroke layer style to these layers and then I rasterized the layer styles. After that I added Drop shadow layer styles to the photo layers...- beszteri
- Media item
- Comments: 7
- Category: Anna Aspnes
-
Comment by 'beszteri' in media 'Change is Here'
Outstanding page! Congrats on the StandingO!- beszteri
- Gallery comment