Anna Aspnes
Thin Strips Masks (on sale July 9) [url=
http://www.oscraps.com/shop/product.php?productid=28116&page=1]Thin Strips Masks[/url]
Days 2 Week 1 (on sale July 9) [url=
http://www.oscraps.com/shop/product.php?productid=32654&cat=628&page=7]Days 2 Week 1[/url]
Urban Stitchez 4 (on sale July 9) [url=
http://www.oscraps.com/shop/product.php?productid=33778&cat=401&page=1]Urban Stitchez 4[/url]
Artplay Palette Summer Days [url=
http://www.oscraps.com/shop/product.php?productid=10009308&page=1]Artplay Palette Summer Days[/url]
Artplay Palette Tangier [url=
http://www.oscraps.com/shop/product.php?productid=44538&page=1]Artplay Palette Tangier[/url]
Skribble Blooms [url=
http://www.oscraps.com/shop/product.php?productid=28405&page=1]Skribble Blooms[/url]
JazzedUp LoopDaLoop 1 [url=
http://www.oscraps.com/shop/product.php?productid=27857&page=1]JazzedUp LoopDaLoop 1[/url]
Summer WordArt 3 [url=
http://www.oscraps.com/shop/product.php?productid=10009285&page=1]Summer WordArt 3[/url]
Artsy Blendz Squash [url=
http://www.oscraps.com/shop/product.php?productid=27606&page=1]Artsy Blendz Squash[/url]
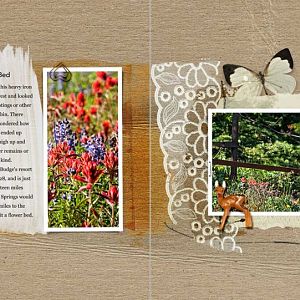
The Process
I selected a neutral background paper from AP Summer. Using the marquee tool on a new layer I created a large rectangle to use as a clipping mask for the background paper and added a shadow. For the under background layer I chose another neutral paper from the same kit. Next I selected a variety of Thin Strips Masks and aligned them on the left side of my paper. Once in place I merged the layers into one layer, duplicated this layer and flipped it using the horizontal tool and moved that layer to the right side of my paper. Using the marquee tool I created a rectangle between the two Thin Strips Masks. Once everything was centered, I merged these layers together and then clipped my photo to the newly merged layer. Elements, word art, brushes were added to finish the page.
TFL