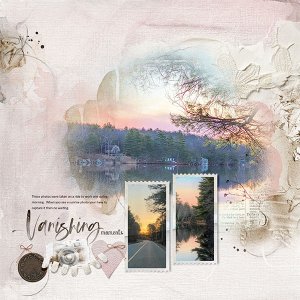
Inspiration – A sunrise drive to work.
Start – Create New File – File>New 12x12 300
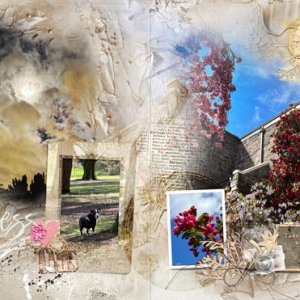
Paper – Placed Solid Paper 2 over the background layer and used Ctrl U to make it more pinkish
Mask - Placed Watercolor Fotoblendz 8.3 on my page. I first turned off all the layers except the mask layer, but once I had the photo attached I turn them back on one by one coloring using Edit>Fill. Added one of the art stroke transfers to the page so that one of the art strokes circled the clock.
Frames – Put Postage Frame 1.3 on the page and duplicated the first one.
Photos – Added my landscape photo to the mask using Layer>Create Clipping Mask, then duplicated the photo. I made the blend mode on the duplicated copy to Screen and added a mask and blacked the lighter areas to bring out the colors.
Transfers – Artsy Transfer 2 was added on the left edge. Artsy Transfer 5 I placed under the photos on the right side.
Cluster – Used the banner, camera stamp, leather heart (recolored to pink), and clock to create the cluster. With the shadow layer of the banner selected I used the warp tool to make the banner look like it popped off the page more going on top of dimensional elements.
Words – Placed the word art Vanishing Moments above the cluster. Typed a quick few words about the pictures. Placed Unfading word transfer above the Artsy Transfer 5.