Tip: Using a layer mask to combine backgrounds
Sometimes I want pieces from different backgrounds on my layout to get my own unique background. And one way to do that is using layer masks.
I will show you how to combine 3 different backgrounds from the kit Take a Chance by Studio 68, available at Oscraps.
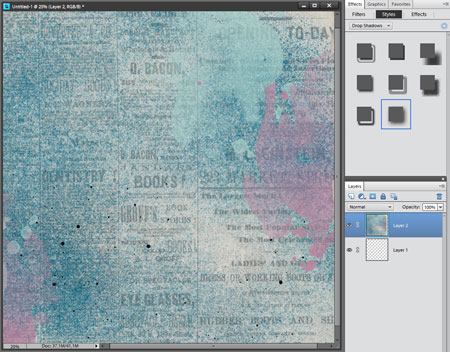
Well, let’s start with a new file. And drag your first background into it.
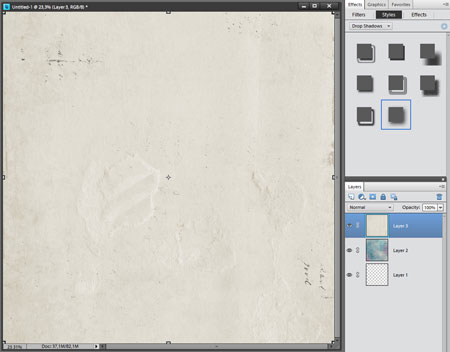
And now a second background.
Ok, so far nothing new.
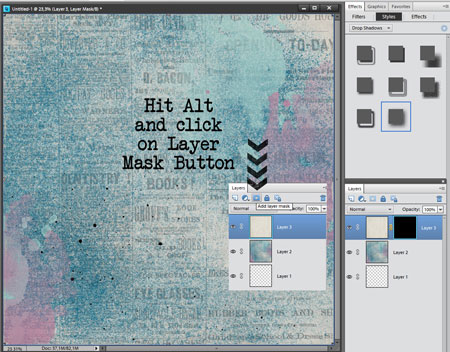
We are going to use a layer mask on the second background paper. Hit Alt on the keyboard and click with the mouse on the layer mask button. If you have done it right, your background will not be visible anymore and in the layer palette you see a black mask next to the paper thumbnail.
Make sure you keep the layer mask selected! You can check that, when it’s selected there is a white line around the mask.
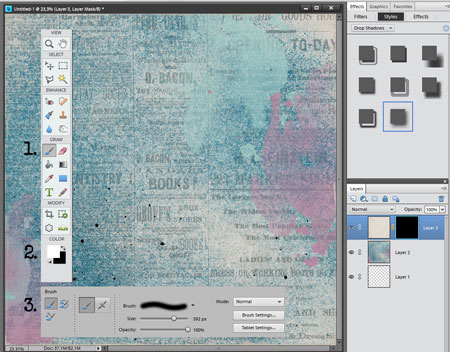
Then you select the brush tool and set the color to white. For this sample I chose a bigger brush with soft edges.
Now you can start brushing back the second background.
On the layer mask thumbnail in the layer palette you can see what you have brushed back. The layer mask isn’t totally black anymore.
If you brushed back too much, you can simple change the color to black and brush on the parts you don’t want to see anymore. Just be sure you still have the layer mask active!
Now you know how this works, you can do the same with extra backgrounds. I wanted to add some parts of the stripes of one of the backgrounds from the kit. You just have to follow the steps above!
When I finished creating this background I started placing my photos and elements. I hope you liked this little tutorial and understand the advantage of using a layer mask: using parts without deleting it.
Here’s my result:


I always forget how to do this…it’s nice to have a reminder for such an important tool!
What a great little tut!! I need to try this!! TFS!!