How to Move a Pattern within a Photoshop Style
Did you know you can easily reposition a Layer Style’s Pattern when using the full version of Photoshop?
It’s very easy! Here’s how
- In the Layers Panel select the layer that has the style you want to adjust.
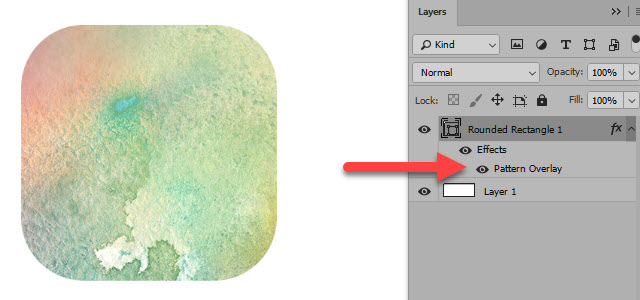
- Click on “Effects” (or anywhere in the “Effects” area, but not on the name of the Layer itself). This will open the Layer Style Panel.
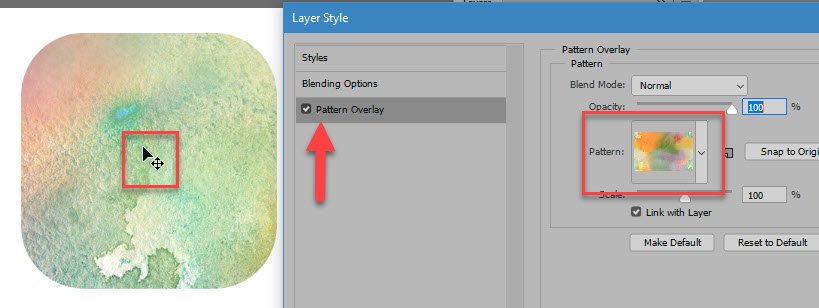
- Click on “Pattern Overlay” in the Layer Style options box on the left to make it active.
- You can see the entire Pattern on the right, in the Pattern Overlay options box. This is handy for re-positioning reference.
- Move to your document. Place your cursor on the object to which you have applied the style. In the image above, I have placed the cursor on the rounded rectangle.
- Left click and hold down with your mouse, then move your cursor around within the bounds of the object to reposition the pattern.
- When you are happy with the result, release the mouse.
So how is this useful?
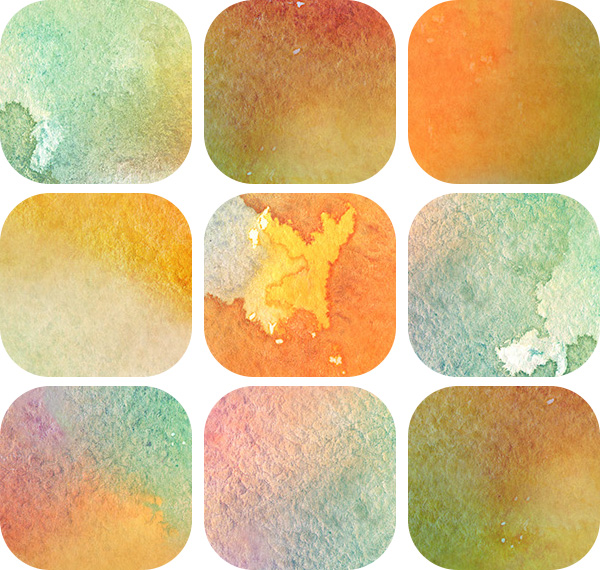
- For the purposes of this tutorial, I used my seamless Watercolor Styles 02. Because the styles are seamless, I moved around the pattern in just one of the style effects and was able to quickly come up with 9 different looks. The ability to reposition patterns exponentially multiplies the options you have when using seamless styles with color variations.
- If you are working with a style that is not seamless, and the shape to which you want to apply a style is larger than the pattern size, you will see the pattern seams. Here’s what that would look like:

By repositioning the pattern, depending upon the size of the style and of the object, you have a good chance of being able to hide the seams. By dragging the pattern a bit to the left, this is the result I was able to achieve with this style:
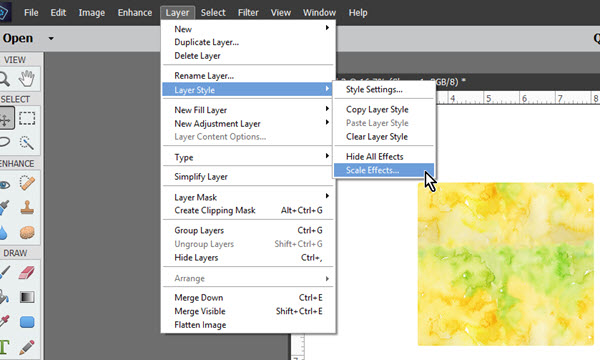
Unfortunately, Photoshop Elements users are not able to reposition patterns, but they are able to Scale a pattern, which can
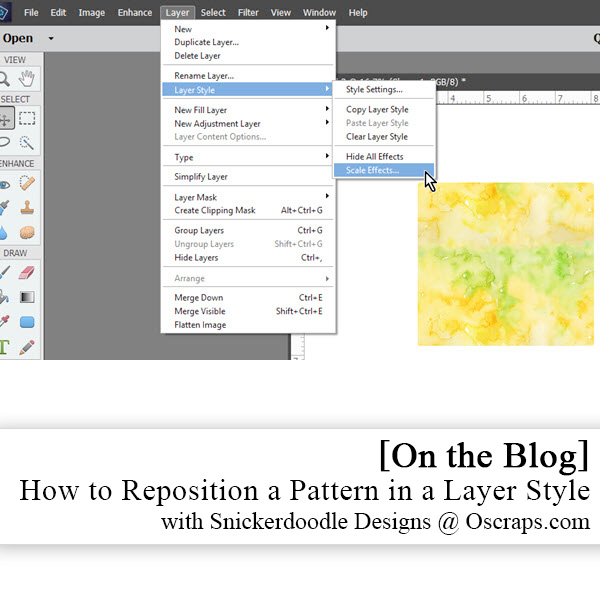
In the top menu bar: Layer > Layer Style > Scale Effects.
Another window will open which has a slider, allowing you to make the pattern larger or smaller. When making a pattern much larger than it is intended, you may degrade the quality of the pattern, so that’s just something to be aware of.
If you would like to download this tutorial, you may do so here.
Thanks for stopping by the blog today! I hope you found this tutorial helpful!
Thanks Karen! I didn’t know about this. Very helpful!
Thanks for your feedback, Diane. I’m glad this was helpful for you!
Karen
This is a wonderful idea. Thank you for telling us about it. 🙂
You are welcome! I’m glad you found it helpful!