Have you ever wanted to use a beautiful mask, but your photo just didn't seem to work with it?
In this example, I'm using a gorgeous mask from ADB Designs and one of her solid papers and a stock photo from Pixabay.
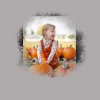
When I was first trying to fit this photo to the mask, here's what it looked like:

There wasn't enough photo around the focal child to fill in all the mask areas, so some of the mask looks black and there are harsh edges to the photo on three sides.
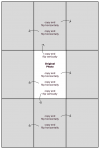
To remedy this problem, I copied and flipped the photo several times, until there were 8 copies surrounding the original photo, like this:

This fills in the space around the original photo, allowing you to fill in all the areas of the mask.
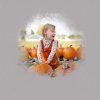
Here's what the mask looks like after doing all the copies and flips:

Special thanks to ADB Designs for the gorgeous masks, which inspired me to share one of my scrapping secrets!
In this example, I'm using a gorgeous mask from ADB Designs and one of her solid papers and a stock photo from Pixabay.
When I was first trying to fit this photo to the mask, here's what it looked like:

There wasn't enough photo around the focal child to fill in all the mask areas, so some of the mask looks black and there are harsh edges to the photo on three sides.
To remedy this problem, I copied and flipped the photo several times, until there were 8 copies surrounding the original photo, like this:

This fills in the space around the original photo, allowing you to fill in all the areas of the mask.
Here's what the mask looks like after doing all the copies and flips:

Special thanks to ADB Designs for the gorgeous masks, which inspired me to share one of my scrapping secrets!


