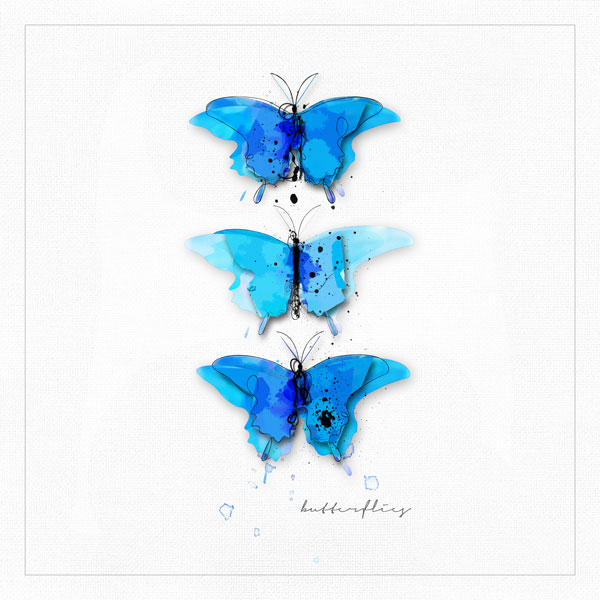
a few people asked me what i meant by adding dimension through cutout, so i made this to try to explain.
step 1: pick a shape. i used Anna's flutterby tattoo transfers. to make things easy, i used the same butterfly all three times.
step 2: add color. i "painted" each of the butterflies in shades of blue. some of the paint comes from stamping Anna's stains over the shapes and changing the blending to a burn mode.
step 3: when you are done painting, make a composite of your image. CTRL + SHIFT + ALT + e. this will be the top layer. now, go to your filters and choose the cutout filter and apply it to the composite layer.
step 4: mask the composite layer and delete the background so all that remains are the butterflies. add a drop shadow to this layer. you should be seeing some dimension!
step 5 (optional): add another dimensional layer. mine is a duplicate of the original image.
step 6: add urban stitchez to the centers of the butterflies to add texture.
step 7: add some splatters and a title.
if you have any questions, please send me a message :-)
Credits
Anna Aspnes
Flutterby Tattoo Transfers No.1
http://www.oscraps.com/shop/product.php?productid=27569&page=1
DifferentStrokes No.6
http://www.oscraps.com/shop/product.php?productid=27961&page=1
UrbanStitchez No.3
http://www.oscraps.com/shop/product.php?productid=33447&page=1
UrbanStitchez No.4
http://www.oscraps.com/shop/product.php?productid=33778&page=1
Light Textured Neutrals No.1
http://www.oscraps.com/shop/product.php?productid=29736&page=1
Thanks for looking :-)