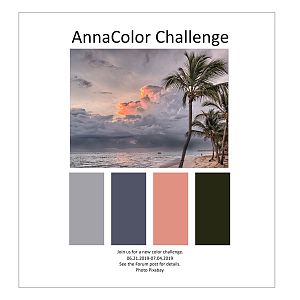
ArtPlay Palette Evenfall https://www.oscraps.com/shop/ArtPlay-Palette-Evenfall.html On Sale
MultiMedia Suns No. 4 https://www.oscraps.com/shop/MultiMedia-Suns-No.-4.html On Sale
Evenfall WordART Mix No. 1 https://www.oscraps.com/shop/Evenfall-WordART-Mix-No.-1.html O Sale
Artsy Layered Template No. 293 https://www.oscraps.com/shop/Artsy-Layered-Template-No.-293.html On Sale
Summer WordART Mix No. 1 https://www.oscraps.com/shop/Summer-WordART-Mix-No.-1.html
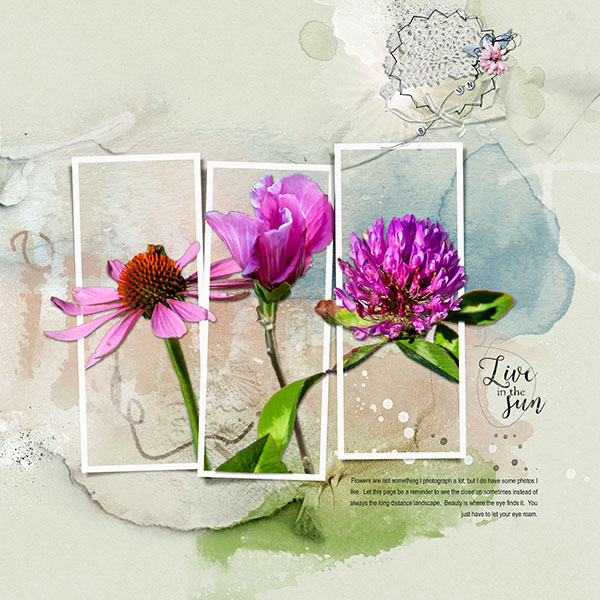
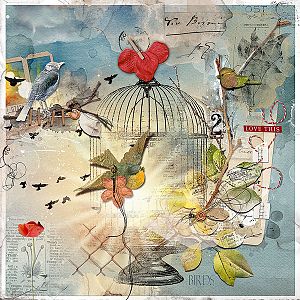
Sometimes you have a picture you want to scrap and you seek out a kit, other times you have a kit and seek out the pictures. On this I started with the ArtsyLayered Template and it spoke to me.
This template and the APP Evenfall seem to speak of sunrises/sunsets at the beach. How perfect for me except I have done several lately. So I thought the colors would work well with flowers.
Process
I started by opening the template. But when I went to select the photo mask I noticed they were turned off. I looked at the template and thought this might have been done to show the colored layers below so some one could make decisions on where the place the frames. But for me I thought about selecting my subjects and placing them behind the frames. I used the extraction method I explained in my tutorial on the Anna Aspnes Blog. This is a link https://www.annaaspnesdesigns.com/upside-down-extraction-and-compositing-technique/ . I double clicked on the white area of the mask and when properties came up clicked okay. This procedure created an extracted layer and turned off the masked layer. (I have to admit that this is something I learned quite by accident but will be something I use going forward.) I double clicked on the layer of the first flower and when a menu popped up selected "Select Pixels" clicked on it which created a selection of the flower. I then clicked on the frame layer and using the Eraser Tool erased the away parts of the frame so the flower appeared to be on top. I repeated with the other flowers.
I added Solid Paper 4 to the page. Then I clicked on the green area and using Hue/Saturation I adjusted the green to more closely match the green leaves and stems of my flowers.
Multimedia Sun 3 was added to the page and using the move tool shrunk down. The sun has a seashell but I didn't think this matched the my photos. So I added the flower from APP Anything and shrunk it down to cover the shell and then erased the stem on both the flower and the shadow. I used Hue/Saturation to make the flower a little more pink. I also used the Hue/Saturation on the paper boat to turn it blue. I added the beaded word Sun to the cluster sizing it appropriately and aligning it with the paper fold on the solid paper. Then I choose the double bowed ribbon but erased the bow on the left. I moved the bow above the beaded word.
I added an art stroke just above the paper and running through the bottom of the frame on the left. I added the word art Life in the Sum from Summer Word Art. Lastly the journaling was done.