Anna Aspnes
ArtPlay Palette Beach [url=
http://www.oscraps.com/shop/product.php?productid=10009081&page=1]ArtPlay Palette Beach[/url]
MultiMedia Frames No. 1 [url=
http://www.oscraps.com/shop/product.php?productid=44759&page=1]MultiMedia Frames No. 1[/url]
Escape WordArt No. 1 [url=ww.oscraps.com/shop/product.php?productid=10008759&page=1]Escape WordArt No. 1[/url]
Artsy Template MultiPack No. 1 [url=
http://www.oscraps.com/shop/product.php?productid=45455&page=1]Artsy Template MultiPack No. 1[/url]
Warm Glows No. 3 [url=
http://www.oscraps.com/shop/product.php?productid=30855&page=1]Warm Glows No. 3[/url]
ArtPlay Palette Adventure (shell) [url=
http://www.oscraps.com/shop/product.php?productid=29867]ArtPlay Adventure[/url]
ArtPlay Palette Ocean Cove (shell) [url=
http://www.oscraps.com/shop/product.php?productid=43872&page=1]ArtPlay Palette Ocean Cove[/url]
Spray Paint No. 2 [url=
http://www.oscraps.com/shop/product.php?productid=27966&page=1]Spray Paint No. 2[/url]
Watercolor Shells No. 1 [url=
http://www.oscraps.com/shop/product.php?productid=10009164&page=1]Watercolor Shells No. 1[/url]
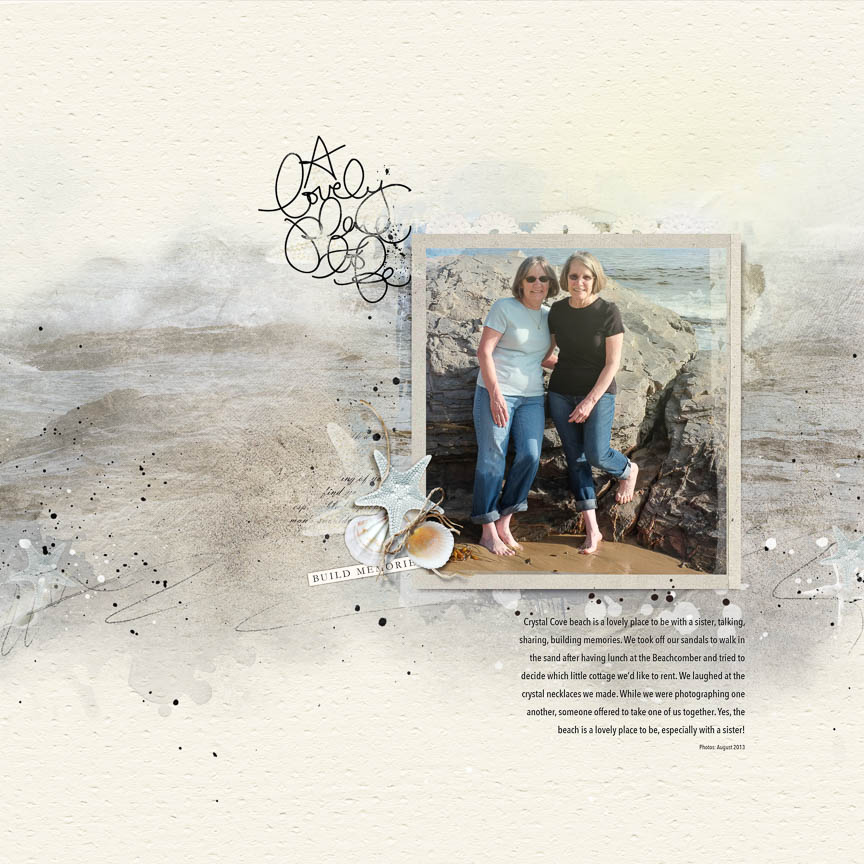
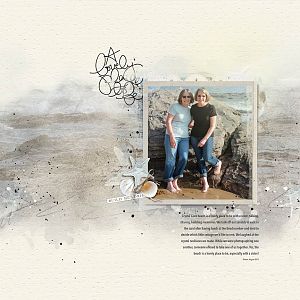
Process: Once I had selected this photo, it was easy to find a template with one frame, decide on the multimedia frames and select an art palette. I used only the text box, two textures, a splatter from the template, but I used the placement of the frame and title to guide me as to where to place the multimedia frame. I moved the layers of the template behind the frame. I clipped my photo to the mask and turned off the elements that didnt work. Just above the photo, I added a warm glow. I placed the star fish from the art palette over the butterfly and turned it off. I clipped a second photo to the paint layer of the multimedia frame to begin extending the scene.
Then I began working with the background, duplicating that second photo that I had clipped to the frame paint layer and using artsy paper 5 as a guide for placement. I clipped the photo to paint layer and blended the edges. I also clipped it to one of the texture layers. Just below that layer, I used a layer mask to blend another copy of the background photo, set the blend mode on multiply and reduced the opacity. I also clipped copies to transfer 12 which I placed on both sides, rotating and masking as needed. I reduced the opacity of those two layers. Below that, I used the sand transfer, brush 1, and several transfers from the art palette before turning off paper 5 and turning on solid paper 1. I went back to make adjustments to blend modes and placement of the transfers. After adding some art strokes, I placed the word art and wrote my journaling. I finished the cluster and added some paint and splatters, shells at a reduced opacity and a couple of watercolor brushes on the edges to create the impression of a visual triangle. Nothing else I tried seemed to work.