Tutorial: Part Photo, Part Sketch
It all started with this layout from Scrappy Irene.

“Please Irene, tell us how you did this!” we clamored.
And she so very graciously accommodated our requests.
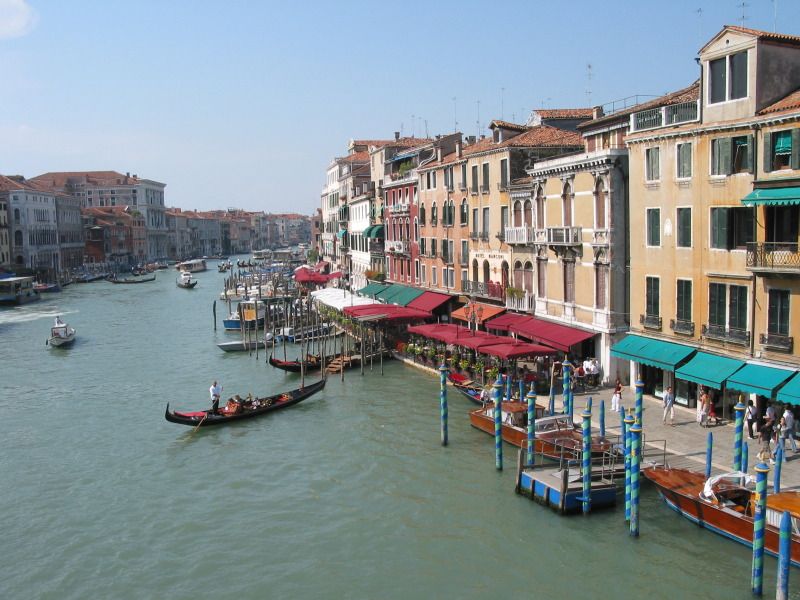
This was my original photo:
Step 1:
Open a new file of 3600 x 3600 px at 300 dpi
Drag a soft white paper into the layout
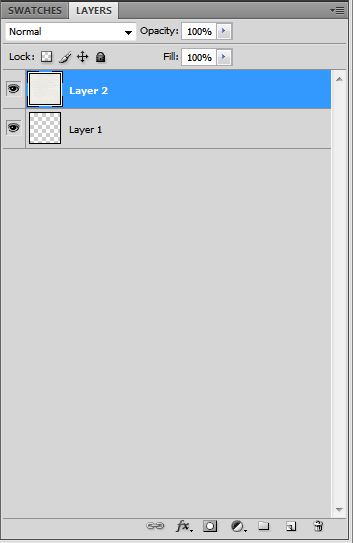
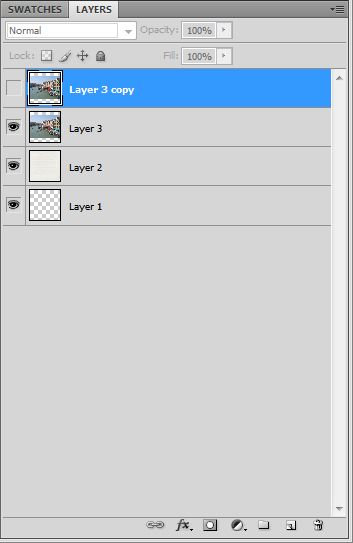
Step 2:
Drag your photo into the layout
Make a copy of it and make it invisible
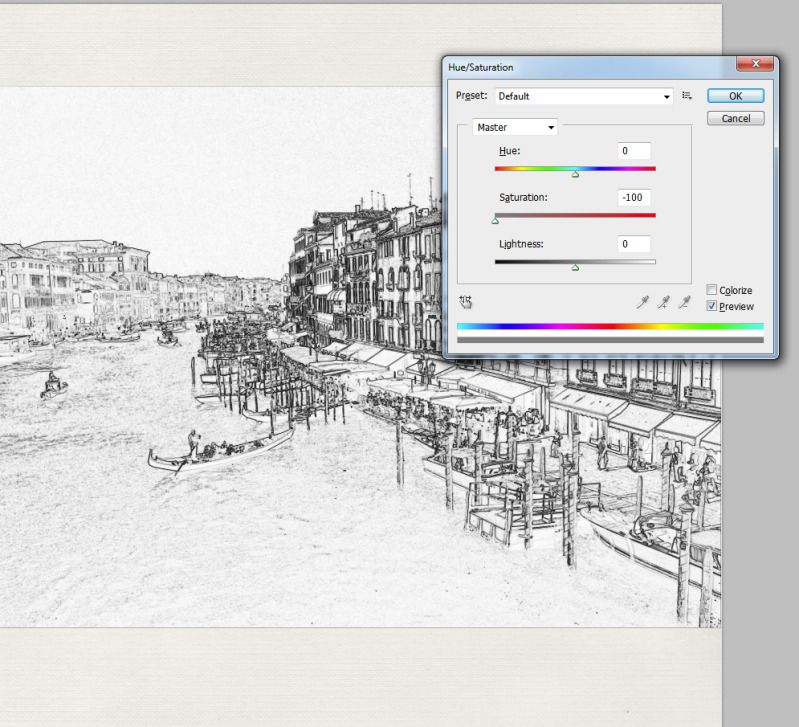
Step 3:
Select the first photo layer
Go to Filter, Stylize, Find Edges
Type Ctrl + Alt + U and change the Saturation to -100
Step 4:
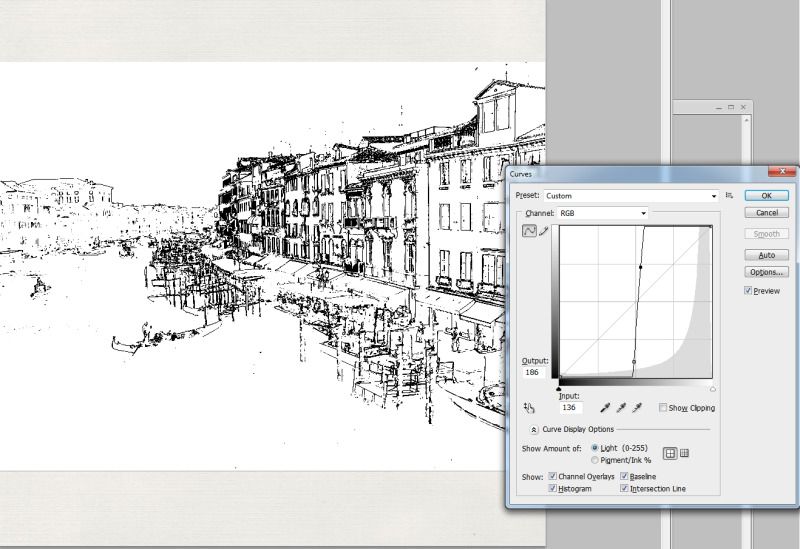
Type Ctrl + M and change the curve as on the image
You get some sort of outlined B&W drawing
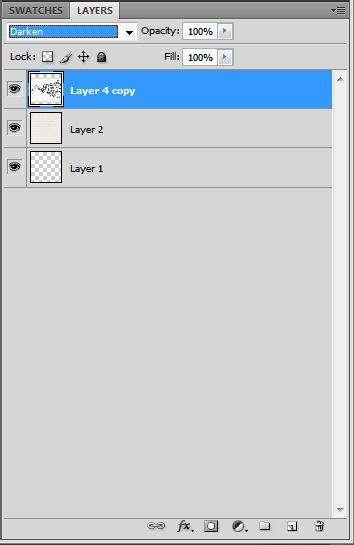
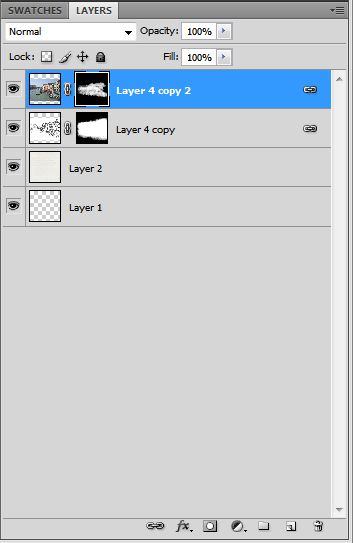
Step 5:
Change the layer setting to Darken instead of Normal (the white will disappear and only the black lines will stay visible)
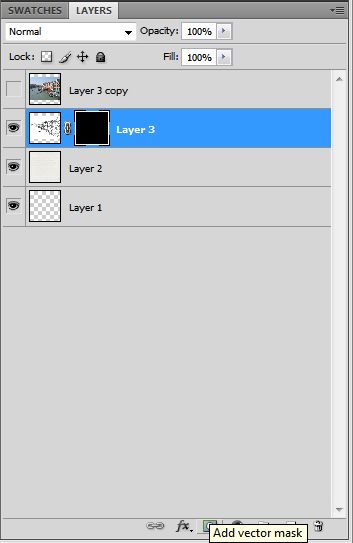
Step 6:
Type Alt and click on the layer mask button at the bottom
The drawing isn’t visible anymore now
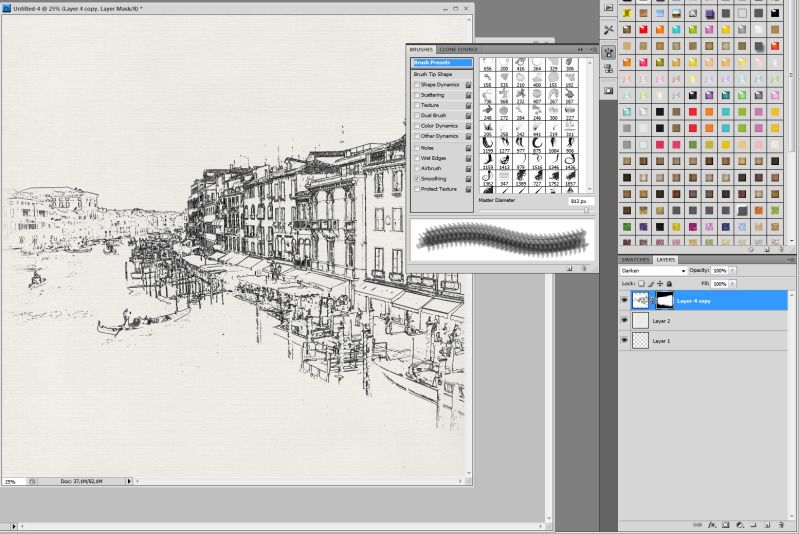
Step 7:
Choose a brush with watercolor effect (SS Waterstains)

Step 8:
Start painting back the drawing (make sure you selected the mask and not the drawing miniature on the right side) but don’t make hard lines at the border of the photo.
If you painted too much, you can change between black and white to delete parts again or draw back.
Step 9:
Make the photo layer visible again and type Alt and click on the layer mask button at the bottom
The photo isn’t visible anymore now.

Step 10:
Select a brush with watercolor effect
Start painting back the drawing (make sure you selected the mask and not the photo miniature on the right side) but keep it all a bit smaller than the drawing layer.
If you painted too much, you can change between black and white to delete parts again or draw back.
Step 10:
Ready!
O-scrappers then went to town with this tutorial. I felt intimidated but found the steps easy to follow and love the results I got with this photo of the port at Portofino.

I had to try it again, this time with a photo of a rowboat with the Golden Gate Bridge in the background.

This one from evadraga has such wonderful color and mystery.

This page from EHStudios shows how the technique can be applied to people photos. I love how the checkered shirt fades to a sketch!

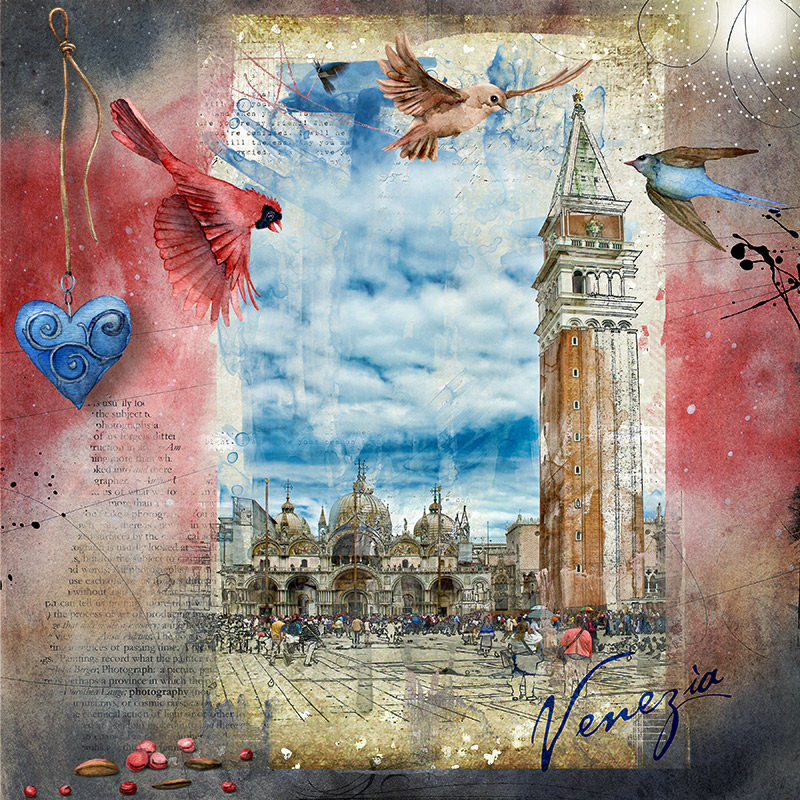
Oh my the color and gorgeousness in this layout from krissez of the Piazza San Marco in Venice.
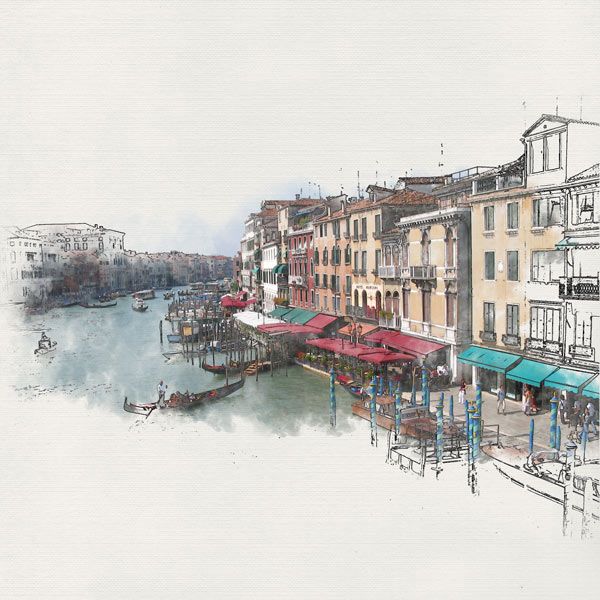
From beedee, just a bit of color in the awnings and trees. Buildings lend themselves so well to the technique!
From Krafty Kacy, more buildings and a little bit of sketch in the background.

One more building example, from tylertoo.

From Merienn, a photo + sketch of the famous Ponte Vecchio in Florence. Note the little sketchy sailboat element!

From faby33, we see how wonderfully water can fade into a sketch.

From donnagoar, we see how colorful sketches can also be very effective!

From CookingMyLife, with the sketchy part in the middle background as well as the edges.

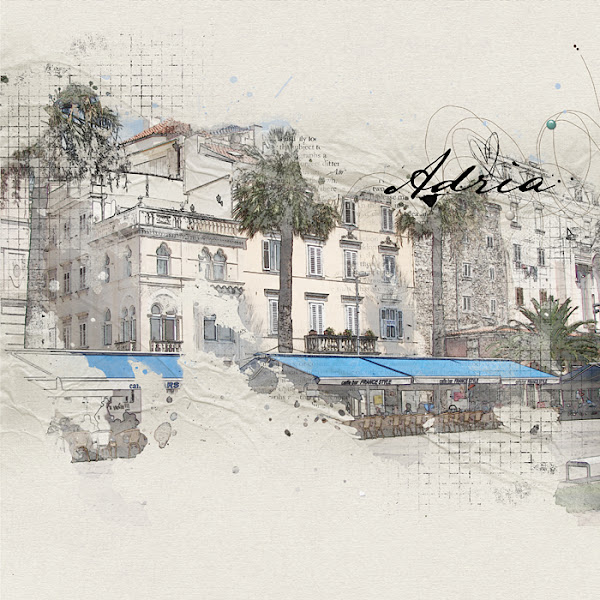
From Marnie333…I think perhaps all of Italy can be well-represented with this technique!

Still in Italy, but how beautiful is this page from Ann06!

And from pepeetje2104, another perfect interpretation of the technique.

I hope you have enjoyed this technique! I for one would love to have a whole book full of these pages of lovely sketch watercolor pages.
Thank you once again to Irene for sharing her knowledge with us!
Absolutely LOVE this technique and everyone’s take on it. Simply brilliant!
Thanks for sharing, it has really motivated to give this technique a try. I just bought some new stuff from Anna and can’t wait to see how it turns out. I may also use some photos from Italy too.
Thank you for showing my watercolor page, I love to see it among so many other beautiful pages in the blog. Thank you. Ann
Awesome tutorial! I’m looking forward to trying the technique soon.
Thanks Diane and Scrappy Irene, here is my page. Next time I’ll pick a different photo that would show off the technique better.
https://ozone.oscraps.com/gallery/showphoto.php?photo=264162&title=sweet-life&cat=500
I really am so happy that everyone is enjoying this tutorial!
Diane, thanks for sharing this article and all these gorgeous pages Irene inspired us to create. THANK YOU, IRENE!!
thanks so much for getting this on the blog!!
Oh this is awesome! Thanks for sharing.
I really enjoyed this tutorial and pages again! This technique is my love! 😀
I inspirated again! 🙂
And thank you for the sharing my layout! 🙂
I’m going to use this technique a lot, I think! So gorgeous and not difficult at all! I’ve tried it out in Elements 10 and there were only a couple of things that had to be done a little differently. In step 4 one has to go into Enhance>Adjust Lighting>Levels and use the sliders (shortcut Ctrl+L). Brush selection in Elements doesn’t offer a choice of presets. But otherwise it works exactly the same. Thanks!!
thank you for showing this technique here, it’s on my to do list . the layouts are so beautiful and different
Simply WONDERFUL !!!!!
Just amazing! What a cool technique! All the layouts featured are just stunning! Thankyou so much for this tutorial! Just love it!
Wow! I am blown away by all these wonderful, fabulous, beautiful, gorgeous samples! Thank you for the tutorial and thanks to everyone who shared their talent.
WOW! WOW! WOW! so beautiful! I can hardly wait until this weekend so I can experiment.
Holy smokes! That is just amazing! You know I don’t have time to play with this today but I’ve pinned it for another day. I just took a trip to Alaska and have tons of pictures that would work with this. I’m glad to see that Jan posted info for PSE 10 too. Thanks, ScrappyIrene! 🙂
This is really cool, am saving this tutorial for when I have some time to play. These look like artworks, and we desperately need something on the walls in our house – I think this technique would be perfect.
Amazing! What a great idea and what beautiful work!
Brilliant! Thank you for putting so much time into this tutorial! I am so excited to give it a beginner’s try!!!
these are wonderful! Like you, I’d like a whole book. Thanks for sharing the technique!
Love this technique but without the masking option, can this technique be tweaked to be used in PSE?
Am so inspired by everyone’s take on the pencil sketch filter in PS. I’ll definitely have to try it. Thanks for sharing the idea.
Is there a technique I can use with Elements 8?
Was so excited to try this. Got to step 4 and that was it. Couldn’t seem to get the curve thing to come up and then ignoring that step, couldn’t seem to progress any further. I think it needs a bit more detailed explanation. Could a video be done and posted? I love learning photoshop techniques from videos. Oh well, hope others were successful!
Can this be done in Paint Shop Pro X3 or 4?
If you kind of know what you are doing?
Beautiful! Can’t wait to try it. I might actually be able to do this! My watercolor painting friends will be amazed!
These are just amazing and so unique! I just finished my first try and it’s such a cool effect! Although I think I might need to go to Italy now!
[…] 2. Turned it into a painted look followng this tutorial: […]
Incredible pictures – I rally want to learn that.
!!!!!! Stunning results, all of them. Thanks for sharing this amazing technique!
LOVE this! Here’s what I did with a peacock photo:
http://www.flickr.com/photos/9436792@N03/7528017368/in/photostream
Julie, this can be done in PSP X3 there are a couple of steps that are slightly different but the result is the same.