Tip: how to change the size of a selection
I love to play with a stroke around things, but sometimes you need it in another size than the standard selection. I will show you in combination with a frame on my layout that was the basic for my selection.
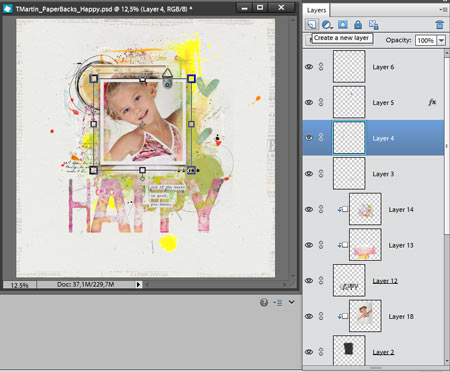
I always create a stroke on a new layer, so first thing I do is click on the frame and then hit the Create New Layer button on top of the layer palette.
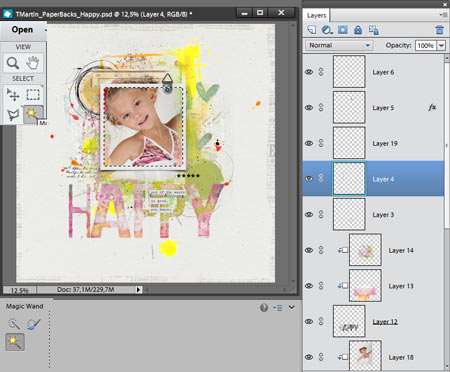
Then I select the frame layer again and choose the Magic Wand tool. I click in the empty space in the frame so select this whole space.
Then choose Select in the top menu, choose Modify and Contract to make the selection smaller and Expand if you want to make the selection bigger. For my sample I chose Contract and 40 pixels so the selection will be 40 px smaller than the original selection.
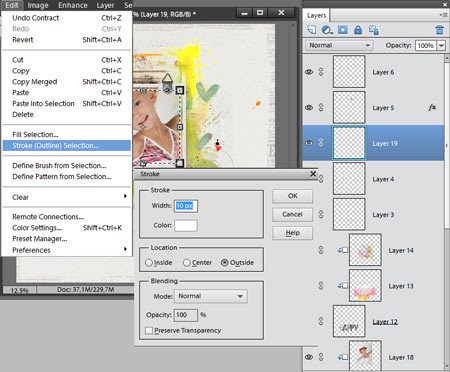
Select the new empty layer again. Then go to the top menu and choose Edit, Stroke (Outline) Selection. I chose the color white and 10 pixels for the sample, but you can choose any color you want and also an other amount of pixels.
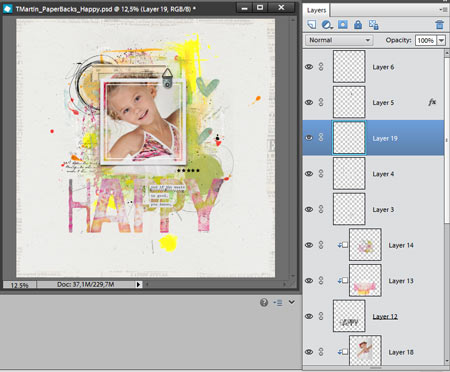
Now the stroke is made you can get rid of the selection by hitting Crtl+D and you’re done!
I showed this on a simple frame, but this technique works great with heart shapes or word balloons too. Normally when you didn’t subtract the selection and just resized the stroke it didn’t fit nicely. With substract and expand you will not have this problem.


ooh excellent tip!