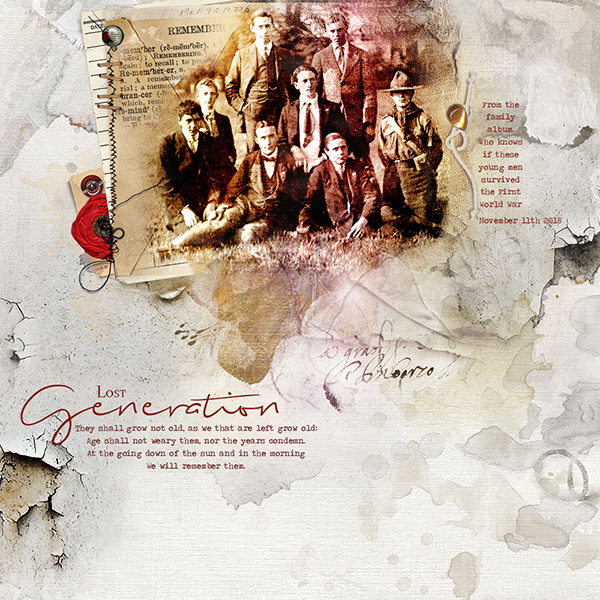
They shall grow not old, as we that are left grow old:
Age shall not weary them, nor the years condemn.
At the going down of the sun and in the morning
We will remember them.
~ Binyon
Supplies
APP_Evanish ( Paper) [url=
https://www.oscraps.com/shop/ArtPlay-Palette-Evanish.html]Product Name[/url]
APP_Hygge (overlays, paint, transfer, buttons) [url=
https://www.oscraps.com/shop/ArtPlay-Palette-Hygge.html]Product Name[/url]
APP_Archive (Transfer,) [url=
https://www.oscraps.com/shop/ArtPlay-Palette-Archive.html]Product Name[/url]
APP_Feuillemort (Transfer) [url=
https://www.oscraps.com/shop/ArtPlay-Palette-Feuillemort.html]Product Name[/url]
APP_Poppy (brad, word transfer, brush, red element) [url=
https://www.oscraps.com/shop/ArtPlay-Palette-Poppy.html]Product Name[/url]
Multimedia Documents No 3 [url=
https://www.oscraps.com/shop/MultiMedia-Documents-No.-3.html]Product Name[/url]
WarmGlows No 2 [url=
https://www.oscraps.com/shop/WarmGlows-No.-2.html]Product Name[/url]
LightLeaks No 1 [url=
https://www.oscraps.com/shop/LightLeaks-No.-1.html]Product Name[/url]
Process
Using a solid Paper on a 12x12 document as my canvas, I dragged my black and white photograph into position then turned off the layer while I prepared the background.
I created layers of transfers, overlays and Multimedia elements on my page turning the photograph on and off to get the positioning right.
I made my photograph active and using the inverted mask method brushed back in the areas I wanted so that it fitted onto the layered background I added a vivid light blending mode. The image was duplicated twice adding a soft light and overlay blending modes.
Then I added a light leak over the image using a screen blending mode. A Warm glow on a hard light blending mode was placed on the right bottom edge of the image to add more light.
Elements and stitching from Multimedia documents and APP Poppy were placed.
Finally I added a title and a quote.
Thanks for looking
Viv