Florence Artsy Transfers **coming tomorrow**
Florence Artplay Palette https://www.oscraps.com/shop/ArtPlay-Palette-Florence.html
Antiquity Word Art No. 1 https://www.oscraps.com/shop/Antiquity-WordART-Mix-No.-1.html
Button Threadz No. 1 https://www.oscraps.com/shop/ButtonThreadz-No.-1.html
Notes in Photoshop Elements 14
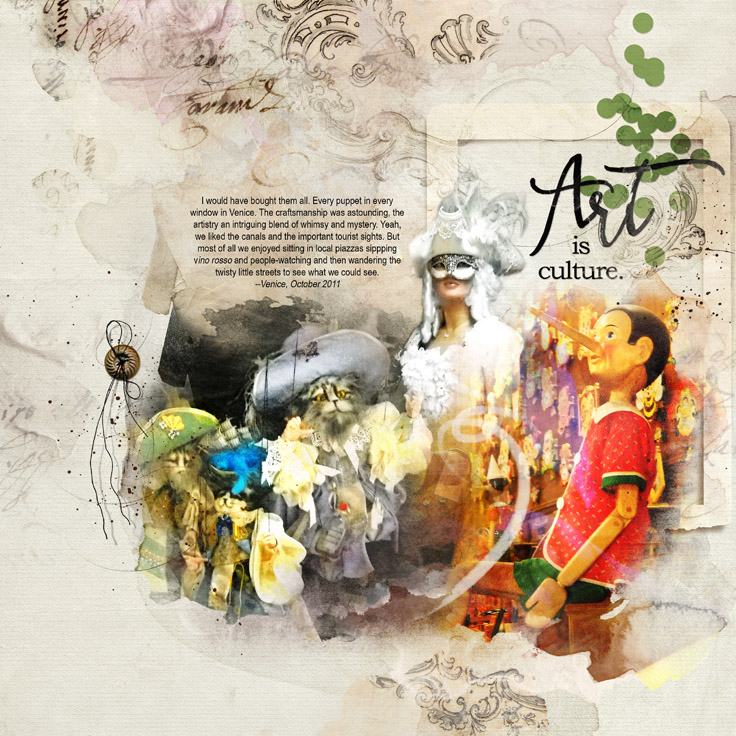
I started my layout by selecting my photos. I had three that I wanted to composite. My plan was to place the cat puppets and Pinocchio photos in a more or less straight line and then to slide in the masked lady between them.
I chose two Artsy Transfers that looked like they would work with the shapes of the cat and Pinocchio puppets. I then clipped the photos and duplicates of these photos to both of the transfer layers in the Artsy Transfers. I had to tweak the transfers with a black artsy brush to allow more of the details on the puppets to show through. Tweaking in this case merely consisted of stamping with black on pivotal areas of the transfer layers, varying opacity as needed.
To make it easier to blend in the masked lady, I experimented with all of the Artsy Papers, ultimately selecting the one that was easiest for me to work withArtsy Paper #3. Because I wasn't crazy about the color, I dragged Solid Paper #1 on top and blended it with Color Burn mode. To enrich the background even more, I did the same thing with Artsy Paper #4
To finish up: I added Artsy Transfer #2 (rotated) along the upper left edge of the page and Artsy Transfer #4 along the right edge, trying to develop a background as lavish as the puppets themselves. I also dropped in the frame on hard light blending mode to suggest the windows we had been so busy looking into, and sprinkled in the confetti (recolored) for a festive air. A button and Button Threadz were the last bits.