I wanted to give Fiona Applechicks wonderful FotoInspired Template Tutorial http://www.annaaspnesdesigns.com/fotoinspired-template-tutorial-coupon/ a whirl because I havent used one before. Fiona made it easy in her tutorial and I had a lot of fun playing, creating my own version. If you havent already, I encourage you to give it a spin, youll be delighted with a complex look done very easily thanks to Annas templates.
FotoInspired Double Template No. 39
FotoInspireCoubleTemplateNo.39
AnnaRelease 7 Novmeber 2014
AnnaRelease7November2014 which consists of:
ArtPlay Palette Together
Beaded Threadz No. 1
PaintedLeaves No. 2
TogetherScripted No. 1
ArtsyLayered Template No. 168
Additional Supplies:
Journey WordART Mix No. 1
JourneyWordARTMixNo.1
ButtonThreadz No. 2
ButtonThreadzNo.2
ArtsyStains No. 2
ArtsyStainsNo.2
Family WordART Mix No. 1
FamilyWordARTMixNo.1
Photo: Jackie Houston Reed
Font: Traveling Typewriter
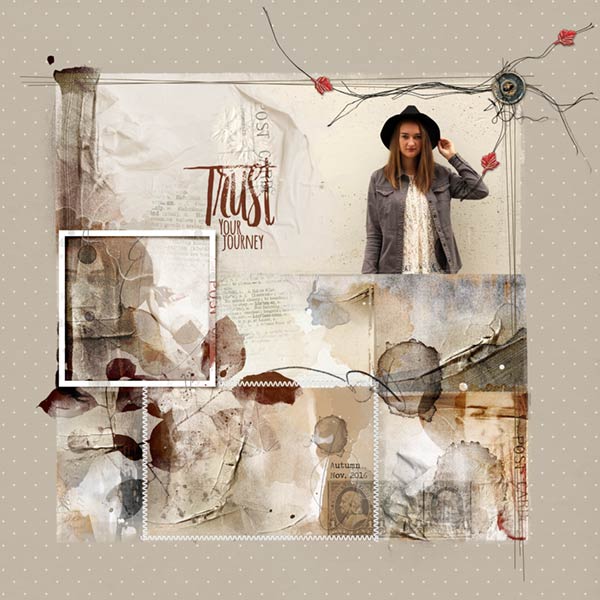
Process Notes: Using the same template as Fiona, I rotated it to use the larger mask for my photo at the top right and like Fiona, I selected all the pieces of the template and made them a little smaller. I deleted the photo mask in the template, but kept the frame and staples. In the place of the photo mask, I placed a transfer and brush from the palette in its place in the upper left corner, which blended nicely into the photo and used the frame later in the process. The background paper is solid paper 2, I love the little dots.
After resizing and clipping the photo in the upper right corner, I brought in several papers from the palette, positioning, resizing and clipping them to the various masks in the template. In this process, you just never know what fun stuff you come up with and I love the unexpected surprises.
Bringing in the black and white version of Autumns photo, resizing and clipping it over the paper along the left edge, I blended the photo with Linear Light at 36% opacity and used the photo frame and staples over it. I duplicated the black and white photo and clipped it to the lower right mask and blended it to Overlay at 100% opacity. I wasnt worried about the obstructions over her face because these were only faint representations of her and added to the artsy look of the whole.
From there, I brought in the painted leaves, recoloring them with a gradient, the stain transfer I placed running up towards the middle from the bottom right, placed word art, and using Blend Ifs on the title. Using one of Adryanes tricks of framing with the line tool, using a color from the palette and placing the threads and leaves and metal button in the upper corner. I blended the stamps to Color Burn and reduced the opacity to 43%. I dirtied the photo frame with artsy stain brushes and a brush from the palette, again using colors from the palette. I dated the page and called it done.