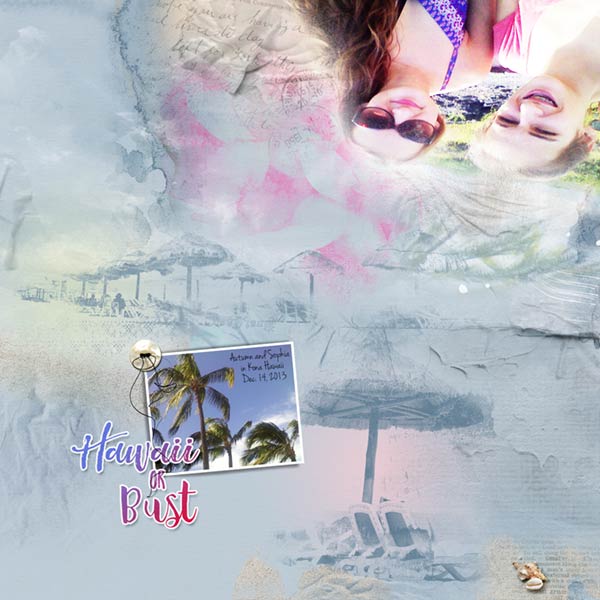
The photo of my Granddaughters is a reflection of them on the rental car hood in Hawaii and I liked they were upside down. There was a palm tree trunk growing out of Sophias head and I brushed it out. Nobody living has a palm tree growing out of their head.
ArtPlay Palette Swell[url=
http://www.oscraps.com/shop/ArtPlay-Palette-Swell.html]ArtPlayPaletteSwell[/url]
ArtsyTransfers Swell[url=
http://www.oscraps.com/shop/ArtsyTransfers-Swell.html]ArtsyTransfersSwell[/url]
Beach WordART Mix No. 1[url=
http://www.oscraps.com/shop/Beach-WordART-Mix-No.-1.html]BeachWordARTMixNo.1[/url]
Oasis No. 2[url=
http://www.oscraps.com/shop/Oasis-No.-2.html]OassNo.2[/url]
MultiMedia Suns No. 2[url=
http://www.oscraps.com/shop/MultiMedia-Suns-No.-2.html]MultMediaSunsNo.2[/url]
Postmarked No. 1[url=
http://www.oscraps.com/shop/Postmarked-No.-1.html]PostmarkedNo.1[/url]
ButtonThreadz No. 2[url=
http://www.oscraps.com/shop/ButtonThreadz-No.-2.html]ButtonThreadzNo.2[/url]
Taped Textures No. 1[url=
http://www.oscraps.com/shop/TapedTextures-No.-1.html]TapedTexturesNo.1[/url]
ArtsyLayered Template No. 219[url=
http://www.oscraps.com/shop/Artsy-Layered-Template-No.-219.html]ArtsyLayeredTemplateNo.219[/url]
TissueTextures No. 6[url=
http://www.oscraps.com/shop/TissueTextures-No.-6.html]TissueTextuesNo.6[/url]
Photo: Jackie Houston Reed
Fonts: Hello Sunshine and Jenna Sue Regular
Process Notes: Starting with solid paper 5 I placed the photo of Autumn and Sophia in the upper right corner and duplicated two more times. Using the blend modes all on 100% opacity are: first layer Normal, second layer Screen and third layer Soft Light. They did not come home this white.
Using the grass umbrellas brushes from Oasis, I placed a couple of those on the page recoloring them a deeper blue of the background. Next I placed the flower brush from the same Oasis brushes and recolored it a pink from Sophias top.
Then I started working with the ArtsyTransfers, placing them over the page. The more transparent transfers I used a Bevel and Emboss and Brightness/Contrast layers to bring out the textures even more. All this depends on your own layout and how the adjustments work with the underlying layers in your panel. I just love playing around with the psd transfers, breaking up the layers in them and using them to their full advantage. Thats the beauty of working with them.
Using the glows from MultiMedia Suns 2, I placed one under the photo leaving it at Normal at 100% opacity, another at the left edge over the umbrella brush, Normal 40% opacity, and behind the large umbrella brush, blending it to Pin Light at 100% opacity.
With the title I clipped a Gradient adjustment layer, used a style to make them a sticker and adjusting the stroke to my liking.
It was time to add the elements to the page. Using a frame from the ArtsyLayered Templet listed, I clipped the palm tree photo, added my journaling, button and thread. Finally adding the shells, word art, which was blended to Multiply and opacity of 41%.
Its so important to play around with Annas supplies, adjusting blending and opacity because youll never know what happy accidents happen that will bring out an added aspect of your layout that will surprise you. Thats the beauty of Photoshop/Elements, nothing is carved in stone, you can easily redo it if you dont like it.