[IMG]
http://i1340.photobucket.com/albums/o723/literacycoach/lkdavis_InaSwingPages_zpsh9heuifb.jpg[/IMG]
Anna Aspnes'
Artsy Transfers Take Flight (available Wednesday)
ArtPlay Palette Take Flight [url=
http://www.oscraps.com/shop/product.php?productid=11013235]ArtPlay Palette Take Flight[/url]
ArtsyPaint No. 7 [url=
http://www.oscraps.com/shop/product.php?productid=11013234&cat=383&page=1]ArtsyPaint No. 7[/url]
Artsy Transfers Oasis [url=
http://www.oscraps.com/shop/product.php?productid=11013220&cat=298&page=1]Artsy Transfers Oasis[/url] (transfer psd layer)
MultiMedia Sun No. 1 [url=
http://www.oscraps.com/shop/product.php?productid=11013102&cat=383&page=2]MultiMedia Sun No. 1[/url] (splatters)
ArtPlay Palette Explore [url=
http://www.oscraps.com/shop/product.php?productid=10013648&page=1]ArtPlay Palette Explore[/url] (transfer)
AnnaBlendz Artsy No. 3 [url=
http://www.oscraps.com/shop/product.php?productid=10009049&cat=389&page=2]AnnaBlendz Artsy No. 3[/url]
Fonts: Very Berry Pro, Adobe Garamond Pro
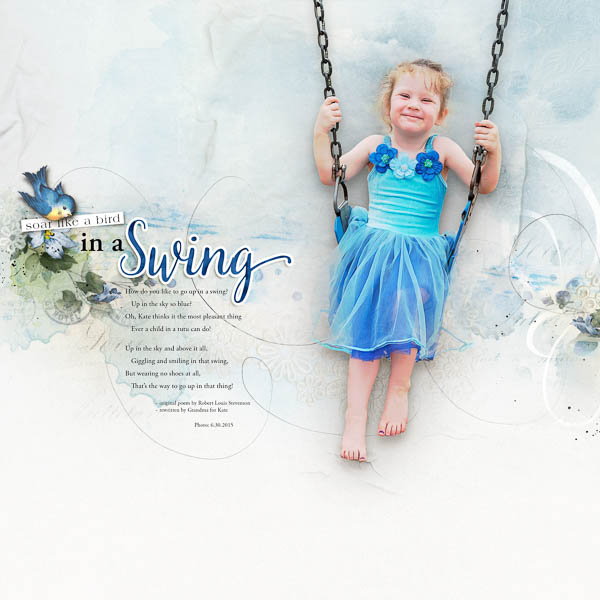
Process Highlights: I often wonder whether my process notes are helpful, especially in those moments when I am confused rereading my own words. So I thought that Id try just listing a few highlights of my process by sharing some ideas that I incorporated into creating this page. If you are new to artsy digital scrapbooking, I hope you find this helpful. Let me know.
1. I blended two papers together for the background, placing solid paper_4 on darken at 75% above solid paper_2 and then added a linear gradient on a layer mask.
2. I clipped a blue color fill layer on overlay blend mode to transfer_7 just above my background paper.
3. I clipped AP Explore transfer_7 (recolored) to a stain layer of AT Take Flight transfer_3 to create some clouds on both pages.
4. I placed a transfer, brushwork and splatters below my title to create a foundation for emphasis.
5. I used artsy paper_3 as a guide/template for working with the artsy transfers.
Thanks for looking:)