[IMG]
http://i1340.photobucket.com/albums/o723/literacycoach/lkdavis_SmilesPages_zpskoexukml.jpg[/IMG]
Anna Aspnes
Artsy Transfers Oasis (coming Wednesday)
Artsy Transfers Splash (coming Wednesday)
ArtPlay Palette Oasis [url=
http://www.oscraps.com/shop/product.php?productid=11013201&cat=383&page=1]ArtPlay Palette Oasis[/url]
UrbanThreadz No. 9 [url=
http://www.oscraps.com/shop/product.php?productid=11013199&cat=298&page=1]UrbanThreadz No. 9[/url]
AnnaBlendz Artsy No. 4 [url=
http://www.oscraps.com/shop/product.php?productid=10012502&page=1]AnnaBlendz Artsy No. 4[/url]
ArtPlay Palette H2O [url=
http://www.oscraps.com/shop/product.php?productid=30915&page=1]ArtPlay Palette H2O[/url] (brush)
Fonts: The Carpenter Regular and Adobe Garamond Pro
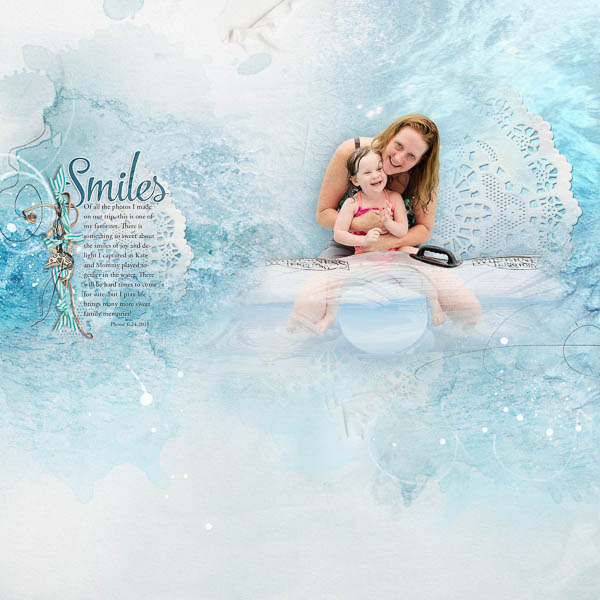
Process: I began by adding a hue and saturation adjustment layer, a curves adjustment and levels adjustment to the photo. There is a sketch at 25% on multiply blend mode just above. I used the pen tool to extract part of the photo and placed that on a mask which I then inverted. I used an AnnaBlendz artsy brush on the mask to blend the bottom of the image. I created a shadowand gave it a gaussian blur with a radius of 45. I then attached a layer mask to the shadow and used the AnnaBlendz Artsy brush to erase the parts I didnt want. Just below the photo layers, I placed four layers from ATSplash_5, recoloring the splatters and reducing the opacity of the transfer layer to 65%. Then I placed transfer_1 below the photo layers and gave it a bevel and emboss style as described in Annas July 4 newsletter. Below that I another copy of transfer_1 which I rotated. Next I placed placed transfer_8. Then continuing down the layers panel are two tape textures from ATOasis_4. and 6 layers from ATOasis_3. Next I placed a texture from ATOasis_2. Below this are six layers from ATOasis_5. I made some adjustments to the positions of some layers and blended on layer masks as needed. Finally I layered transfer_9 just above artsy paper_4B. I changed the blend mode of that paper to linear burn at 60%. At the very bottom is solid paper_2.
Above the photo, I placed artstroke_2 (right side erased using a layer mask) and the art stroke from ATSplash_5. I placed transfer_1. Above that are several plates from AT Splash_1 and _2 which I recolored white. I then placed another copy of transfer_1, resized and with smaller bevel and emboss style. Then I created a vertical cluster with elements from AP Oasis to create a border my journaling. I added additional splatters on the left. For my title, I selected a color from the background and a script font. I gave the title a stroke and drop shadow. I changed the blend mode of the type layer to linear burn and reduced the opacity to 85% which allowed some of the background to show through. I finished my journaling and gave it an outer glow to make it more visible.
Thanks for looking:)