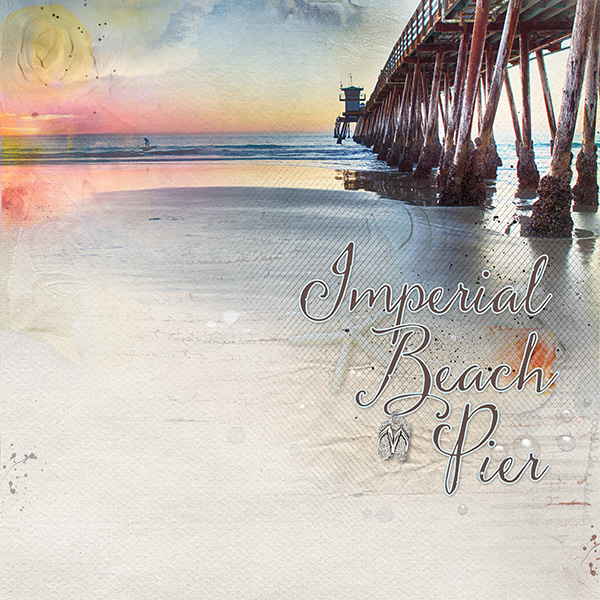
I spent much of Saturday trying to decide on a photo to use for this weeks AnnaLift. Thank-you for the wonderful inspiration page Pornic created by timounette. https://ozone.oscraps.com/forum/showthread.php?t=31547 It was the perfect inspiration layout for this photo of a Pier not too far from me, and the southern most pier in California, not far from the Mexico border. It is a fishing pier, and has a small restaurant at the very end.
Everything by Anna Aspnes:
ArtPlay Palette Summery http://www.oscraps.com/shop/product.php?productid=11013104&cat=383&page=1
MultiMedia Suns No. 1 http://www.oscraps.com/shop/product.php?productid=11013102&cat=383&page=1
ArtPlay Palette Behold http://www.oscraps.com/shop/product.php?productid=10012577&page=1
WaterDrops No. 4 http://www.oscraps.com/shop/product.php?productid=30327&page=1
ArtPlay Palette beautiful Day http://www.oscraps.com/shop/product.php?productid=10008432&page=1
ArtPlay Palette Find My Way 2 http://www.oscraps.com/shop/product.php?productid=27641&page=1
ArtPlay Palette Seafoam http://www.oscraps.com/shop/product.php?productid=27675&page=1
ArtPlay Palette SeaLife http://www.oscraps.com/shop/product.php?productid=44332&page=3
ArtPlay Palette Ocean Cove http://www.oscraps.com/shop/product.php?productid=43872&page=1
ArtPlay Palette Joyful http://www.oscraps.com/shop/product.php?productid=46647&page=1
My Process. I began with the neutral cardstock from AP Summery. I added the photo, scaling it to fit across the top of the layout. I then place a guide at the edge of the photo, so that once I use the inverted masking technique from AnnaBlendz No. 4 http://www.oscraps.com/shop/product.php?productid=10010902&cat=422&page=1 I can easily tell the limits of my photo. A tip I use for knowing the limits of the photo is to drag a guide to the edge of the photo prior to adding the layer mask. Once I painted the image back unto the layout, I played around with different blend modes, and ended up with three layers of photos, with the lowest layer being placed on blend mode multiply. The middle layer was placed on hard light, and the top layer was placed on pin light. I played around with each layer, masking more on some, less on others to best show the photo. I then began adding transfers under the photo layers adding a bit of color, and textures. I added a few splatters, softening their color to a soft gray, and then added a thin lined diagonal brush from AP Find My Way 2, copying it and moving it to different portions of the sand area below the pier. I then duplicated these, and flipped them horizontally, giving it a diamond hatch look. I reduced their opacity to about 60% to not overpower. I then added the large title, and played around with different colors for both the text and the stroke, pulling both of the colors from those found within the photo. I took the flipflop charm and added it to the bottom of the B in Beach, masking out a portion of the loop to make it look like it was threaded on the B. I then added the shell from AP Summer, and the Starfish from AP Seafoam under the title, and under a few of the transfers that were added. With the transfer being placed on various blend modes, it allowed a hint of the shells to show through. I added the water drops, and finished with the MM Sun in the sunset area, placing it on blend mode color reducing the opacity to about 70%.
Font: Butterscotch
Thanks for looking