[IMG]
http://i1340.photobucket.com/albums/o723/literacycoach/lkdavis_twobytwopages_zpsutbno02s.jpg[/IMG]
Anna Aspnes
Artsy Transfers Explore (coming Wednesday)
ArtPlay Palette Explore [url=
http://www.oscraps.com/shop/product.php?productid=10013648]ArtPlay Palette Explore[/url]
MultiMedia Flowers No. 3 [url=
http://www.oscraps.com/shop/product.php?productid=10013646]MultiMedia Flowers No. 3[/url]
Live WordTransfers No. 1 [url=
http://www.oscraps.com/shop/product.php?productid=10013647&cat=398&page=1]Live WordTransfers No. 1[/url]
AnnaBlendz Artsy No. 5 [url=
http://www.oscraps.com/shop/product.php?productid=10013238&page=1]AnnaBlendz Artsy No. 5[/url]
Stitched By Anna Threads White No. 1 [url=
http://www.oscraps.com/shop/product.php?productid=27835&page=1]Stitched By Anna Threads White No. 1[/url]
FotoGlows No. 2 [url=
http://www.oscraps.com/shop/product.php?productid=27709&page=1]FotoGlows No. 2[/url]
CoolGlows No. 2 [url=
http://www.oscraps.com/shop/product.php?productid=31026&page=1]CoolGlows No. 2[/url]
ArtPlay Palette Merry Tree [url=
http://www.oscraps.com/shop/product.php?productid=10011335&page=1]ArtPlay Palette Merry Tree[/url] (artstroke)
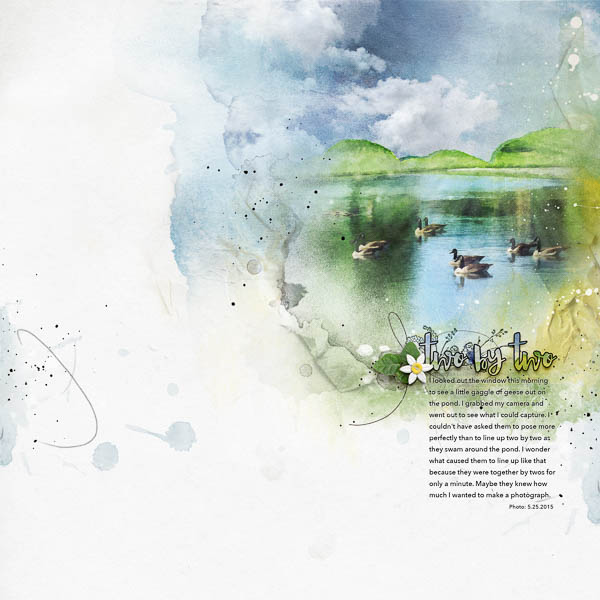
Process: Inspired by the color in this beautiful palette, I began this layout by creating a sketch as explained here [url=
http://youtu.be/lX1KdFwf9VE]here[/url] and applied some filters to the photo. Then I stamped brush_1 from the AP twice on a new blank layer to create a mask for my photo. I clipped the layers of my photo to the mask and used AnnaBlendz Artsy No. 5 to adjust the mask. Below the mask I initially placed transfer_7 and transfer_8. I also adjusted the color of transfer_7 with a hue and saturation layer. I attached a layer mask to transfer_8 and used AnnaBlendz Artsy No. 5_8 to blend. I stamped brush_10 on a new layer and placed it between transfer_7 and transfer_8.
Next, I brought in the layers of the .psd Artsy Transfers Explore, placing transfers 1, 4 and 5 above the paper. I moved the artstrokes, textures, splatters and two paint layers above the photo. I attached a layer mask to four layers and again used AnnaBlendz Artsy brushes to adjust. Then I experimented with the layer order of the remaining transfer layers that were below the photo layers and two transfers from the AP. I deleted some layers. A tape from transfer_5 is at the top, then 4 layers from transfer_4, three more layers from transfer 5 and finally 6 layers from transfer_1. The layers below my photo layers were primarily the stains, paint and two transfers as well as another tape and texture. I attached a layer mask to only one of these layers. I also adjust the opacity of some of the layers. I explain the basics of this in a video [url=
http://youtu.be/3kmVpslACcA]here[/url].
I finished my journaling and placed overlay_2 on the right side, attaching a mask to erase the stroke. Then I added a title above my journaling, clipped an artsy paper to it and gave it a stroke style. Below my journaling I dragged over the .psd layers of MultiMedia Flowers3_4. I turned off the rope and repositioned the white splatter. I gave the line drawing an embossed style and tucked it behind the title. Finally, to play with the light a little, I added a fotoglow in the top right corner and a cool glow over the water.
Thanks for looking:)