Credits:
ArtsyTransfers Capture[url=
http://www.oscraps.com/shop/product.php?productid=10012641]ArtsyTransfers Capture[/url] by Anna Aspnes
ArtPlay Palette Capture[url=
http://www.oscraps.com/shop/product.php?productid=10012618&page=1]ArtPlay Palette Capture[/url] by Anna Aspnes
WarmGlows No 8[url=
http://www.oscraps.com/shop/product.php?productid=10011569&page=1]WarmGlows No 8[/url] by Anna Aspnes
ArtPlay Palette Viaggio[url=
http://www.oscraps.com/shop/product.php?productid=31151&page=1]ArtPlay Palette Viaggio[/url] by Anna Aspnes
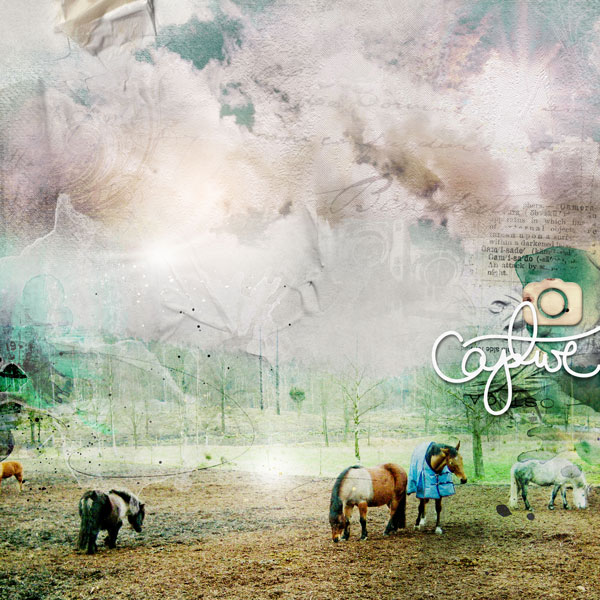
Process: I started with an Artsy paper from the APP Capture. I placed a solid paper from the same APP over it and set the blendmode to Color Burn to get it darker. I placed two copies of the photo above, the first set to blendmode Color Burn and the other to Soft Light. I added an adjustmentlayer for Curves to the first, to get it darker in the bottom and lighter in the top of it. I then placed an ArtsyTransfers Capture on the right side. I deleted some layers and changed the blendmode for a few of them. I placed another ArtsyTransfers Capture in the top left corner and set the blendmode to Saturation to achieve a yellow light. A copy of this layer was set to Color Burn. I added a wordtransfer on the right side and changed the blendmode to Linear Burn. I placed an overlay from APP Viaggio on the top half of the page. I did two adjustmentlayers, one for Selective Color and another one for Hue/Saturation and clipped both to the overlay. At this point I added an adjustmentlayer for Curves that affected all layers below and I got more contrast. Afterwards, I used the Clone Stamp Tool on the right side of the background paper to get rid of some darken parts and I also used Burn Tool and Dodge Tool to achieve light along the horizon in the photo and darker parts in the top and bottom of the page. I finished my page with some WarmGlows No 8, an overlay on the left side in the middle, the title and an embellishment.