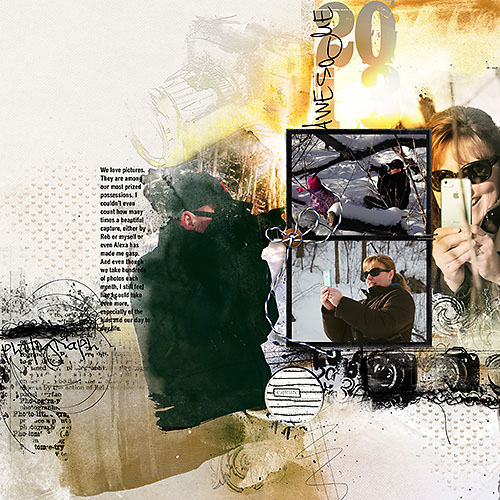
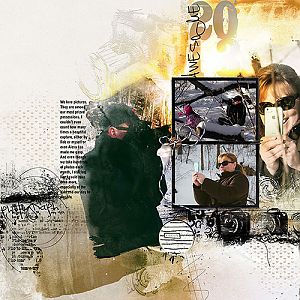
Process: I first clipped my photos to the masks in the template. I then added various transfers above and below the photos, changing the color of each one to match my photographs. I kept the blending modes normal except for the one in the upper right corner-that one is Hard light. Next I added the camera brushes. I clipped a transfer to the big one and changed the Blending mode to vivd then gave it a light shadow to add texture. next i added the heart brush and changed the color again. I added the word transfer (linear burn mode) and placed the stitching on top. The circle is a Fotobrad on vivid light blending mode then duplicated swith the blending mode to overlay then add an inner shadow.
This site uses cookies to help personalise content, tailor your experience and to keep you logged in if you register.
By continuing to use this site, you are consenting to our use of cookies.