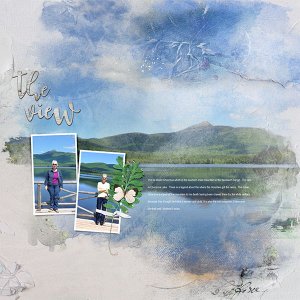
Inspiration – I was inspired to try something after attending Monday’s session with Anna, The prime reason I keep attending – new ideas. In this case I am giving it my own simple style.
Start – Artsy Layered Template and removed all the layers except the frames and the text box and “Title Here.
Paper – Placed Solid Paper 4 above the background layer
Masks – I used Scenic Fotoblendz 1 and 3, plus Sky Transfer transfer 3 (which I am using in this case as a mask.)
Photo – I took the photo of Mt Chocorua and enlarged it to cover the whole page. I placed it above the Sky Transfer and used Layer>Create clipping mask. Then I copied the photo twice putting each copy above each of the Fotoblendz and attached it in the same manner. Then I moved things the various masks around until I got the look I liked. Moving the Masks and not the photo is easier to do. Then I used both brush and eraser to adjust these masks. I used the brush to bring out places on the photo I wanted to be clear. I used the eraser set at 35% opacity to create a bit of texture and interest. I set the Blend Mode of the Sky Transfer to Multiply.
I then took two photos of myself and my friend in front of the Mountain. I attached each to one of the mask layers of the frames using Layer>Create Clipping Mask.
Transfer – I placed Sky transfer 4 in the upper right-hand corner.
Elements – I made a small cluster out of the leaf, butterfly, and paper strip and placed it on the right edge of the double frames.
Words – I used the wood words The View Which I added a drop shadow to and used levels on to make it a little darker. I typed a quick paragraph in the text box and then added a layer behind and painted white at a low opacity to help the words stand out.
[I] [/I]

