Process...
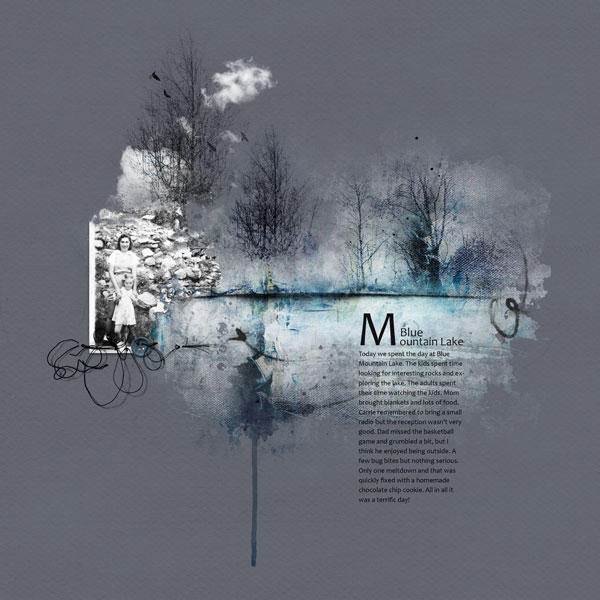
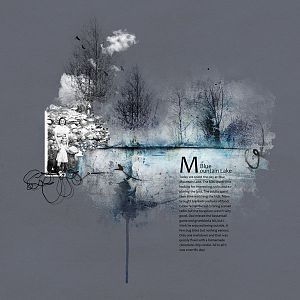
I took one of the new fotoblendz overlays and clipped several copies of AP Heath Transfer No.2 to it. I changed the blending mode on some of the transfer layers to Color Burn to intensify the blue. Then I took the the trees from Trees No.4 and added them over the masked transfer. I added the photo and roughly masked out portions on the right so that I could try to get the rocks to line up correctly under the trees. There is a tree in the background of the photo so I used another Tree No.4 file and made it an extension of the tree in the photo. I added some transfers (the dark lines), the button, some stitching, and the journaling and it was done.
Topissime Adryane, trs beau travail avec les brushs, masques et les couleurs, je regarde avec attention votre faon de procder et je me demande si un jour je serais capable de faire cela, j'utilise photoshop depuis 1 an....Bravo pour votre crativit. vous m'inspirez .
Oh, magnifique, love all of it!!
This goes right into my favorites; you make me to want lifting this page.
With your explanations it all seems so simple! ; )
This site uses cookies to help personalise content, tailor your experience and to keep you logged in if you register.
By continuing to use this site, you are consenting to our use of cookies.