Page 1 https://ozone.oscraps.com/gallery/showphoto.php?photo=329077&title=cabrillo-tide-pools-pg-1&cat=1351
Everything by Anna Aspnes:
Be sure to check out Annas sale items each week: https://www.oscraps.com/shop/home.php?cat=398
ArtPlay Palette Wonderful https://www.oscraps.com/shop/product.php?productid=47649&cat=398&page=1
4 x 6 ArtsyKardz Reflections https://www.oscraps.com/shop/product.php?productid=45157&cat=398&page=1
12 x 12 ArtsyKardz Natural Instinct https://www.oscraps.com/shop/product.php?productid=43329&cat=398&page=1
FotoInspired Template No. 23 https://www.oscraps.com/shop/product.php?productid=44238&cat=398&page=1
ArtPlay Palette Beach https://www.oscraps.com/shop/product.php?productid=10009081&page=1
ArtPlay Palette H20 https://www.oscraps.com/shop/product.php?productid=30915&page=4
ArtPlay Palette Sea Life https://www.oscraps.com/shop/product.php?productid=44332&page=2
ArtPlay Palette Salty Living https://www.oscraps.com/shop/product.php?productid=30847&page=4
ArtPlay Palette Ocean Cove https://www.oscraps.com/shop/product.php?productid=43872&page=2
ArtPlay Palette Seafoam https://www.oscraps.com/shop/product.php?productid=27675&page=5
UrbanStitchez No. 8 https://www.oscraps.com/shop/product.php?productid=10009802&page=1
UrbanStitchez No. 9 https://www.oscraps.com/shop/product.php?productid=10012617&page=1
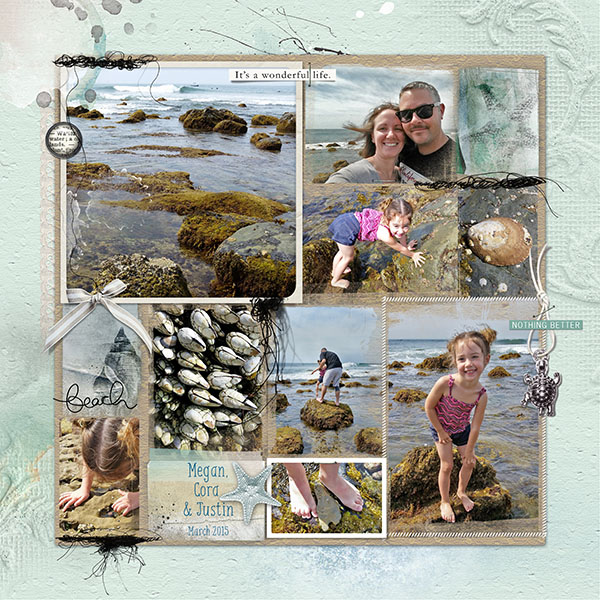
The Process: Annas FotoInspired Templates make a page so easy. I began with a base cardstock and then started placing the photos. I attached ArtsyKards to the clipping masks that I chose not to place photos in. Once the photos were place, I began adding transfers and brushes mainly from AP Wonderful, but also included items from the many beach palettes that Anna has. I played around with various blend modes on some of the transfers to best work with my color palette. Once the transfers were added, I began adding some elements throughout, as well as UrbanStitchez. I created a clipping mask (rectanglular shape), just a touch larger than the photo area, and then attached another cardstock to it. I then added the journaling. For the title I started in Illustrator to take advantage of the various glyphs, and then brought the text in as a smart object. I then changed the color of the text, added a stroke, and a shadow. The font I used did not have a bold version, and was a bit thin, and seemed to get lost on the page, so I copied each piece of text, and then turned off the shadow, and changed the white stroke to a thin stroke in the same color as the text (1 or 2 px), to make it a bit bolder, and thus easier to be seen on the page.
Fonts: ButterScotch, Espresso
Tfl